15 Easy Halloween Makeup Ideas 2026: Cute, Scary & Last-Minute
Last updated: November 7, 2026
You don’t need a costume. You need 20 minutes and a black eyeliner.
Bonjour! It’s J.
Real reviews — my own money, my own experience.
Halloween 2026 is around the corner, and here’s the truth nobody tells you: the best costumes at the party are never the most expensive ones. They’re the ones with the makeup. A CA$14 eyeliner does more for your Halloween than a CA$80 costume ever will.
This year, two trends are dominating: KPop Demon Hunters (Rumi’s purple braid is everywhere on TikTok) and Wednesday Addams gothic minimalism. I’ve rounded up 15 looks — from 15-minute beginner wins to full showstoppers — with real Canadian prices, real products you can grab at Sephora Canada, Shoppers Drug Mart / Pharmaprix, or Amazon.ca, and honest time estimates. Official website
🌿 Quick Take
- The best Halloween costumes are makeup, not costumes: a CA$14 eyeliner does more than a CA$80 costume. This guide rounds up 15 looks, sorted by skill level, with real Canadian prices (as of October 2026).
- Beginners (15–25 minutes): Wednesday Addams and three more easy looks using products you probably already own.
- Intermediate (40–60 minutes): the half-face glam skeleton and more — the looks that photograph incredibly well.
- Advanced (60+ minutes): a realistic zombie built on the bruise-wheel technique, plus other showstoppers.
- Running late? Five bonus looks take under 5 minutes each — bat-wing liner, vampire bite, scarecrow stitch and more.
- Most looks work with regular makeup — no special face paint needed — and sensitive-skin-safe options are marked throughout.
🌱 Beginner Looks: 15–25 Minutes, Zero Stress
Never done Halloween makeup before? Start here. These four looks use products you probably already own, take under 25 minutes, and still get compliments all night.
🖤 1. Wednesday Addams
The easiest iconic look of 2026. Wednesday’s whole thing is restraint — pale skin, deadpan eyes, dark lips. No blending skills required.
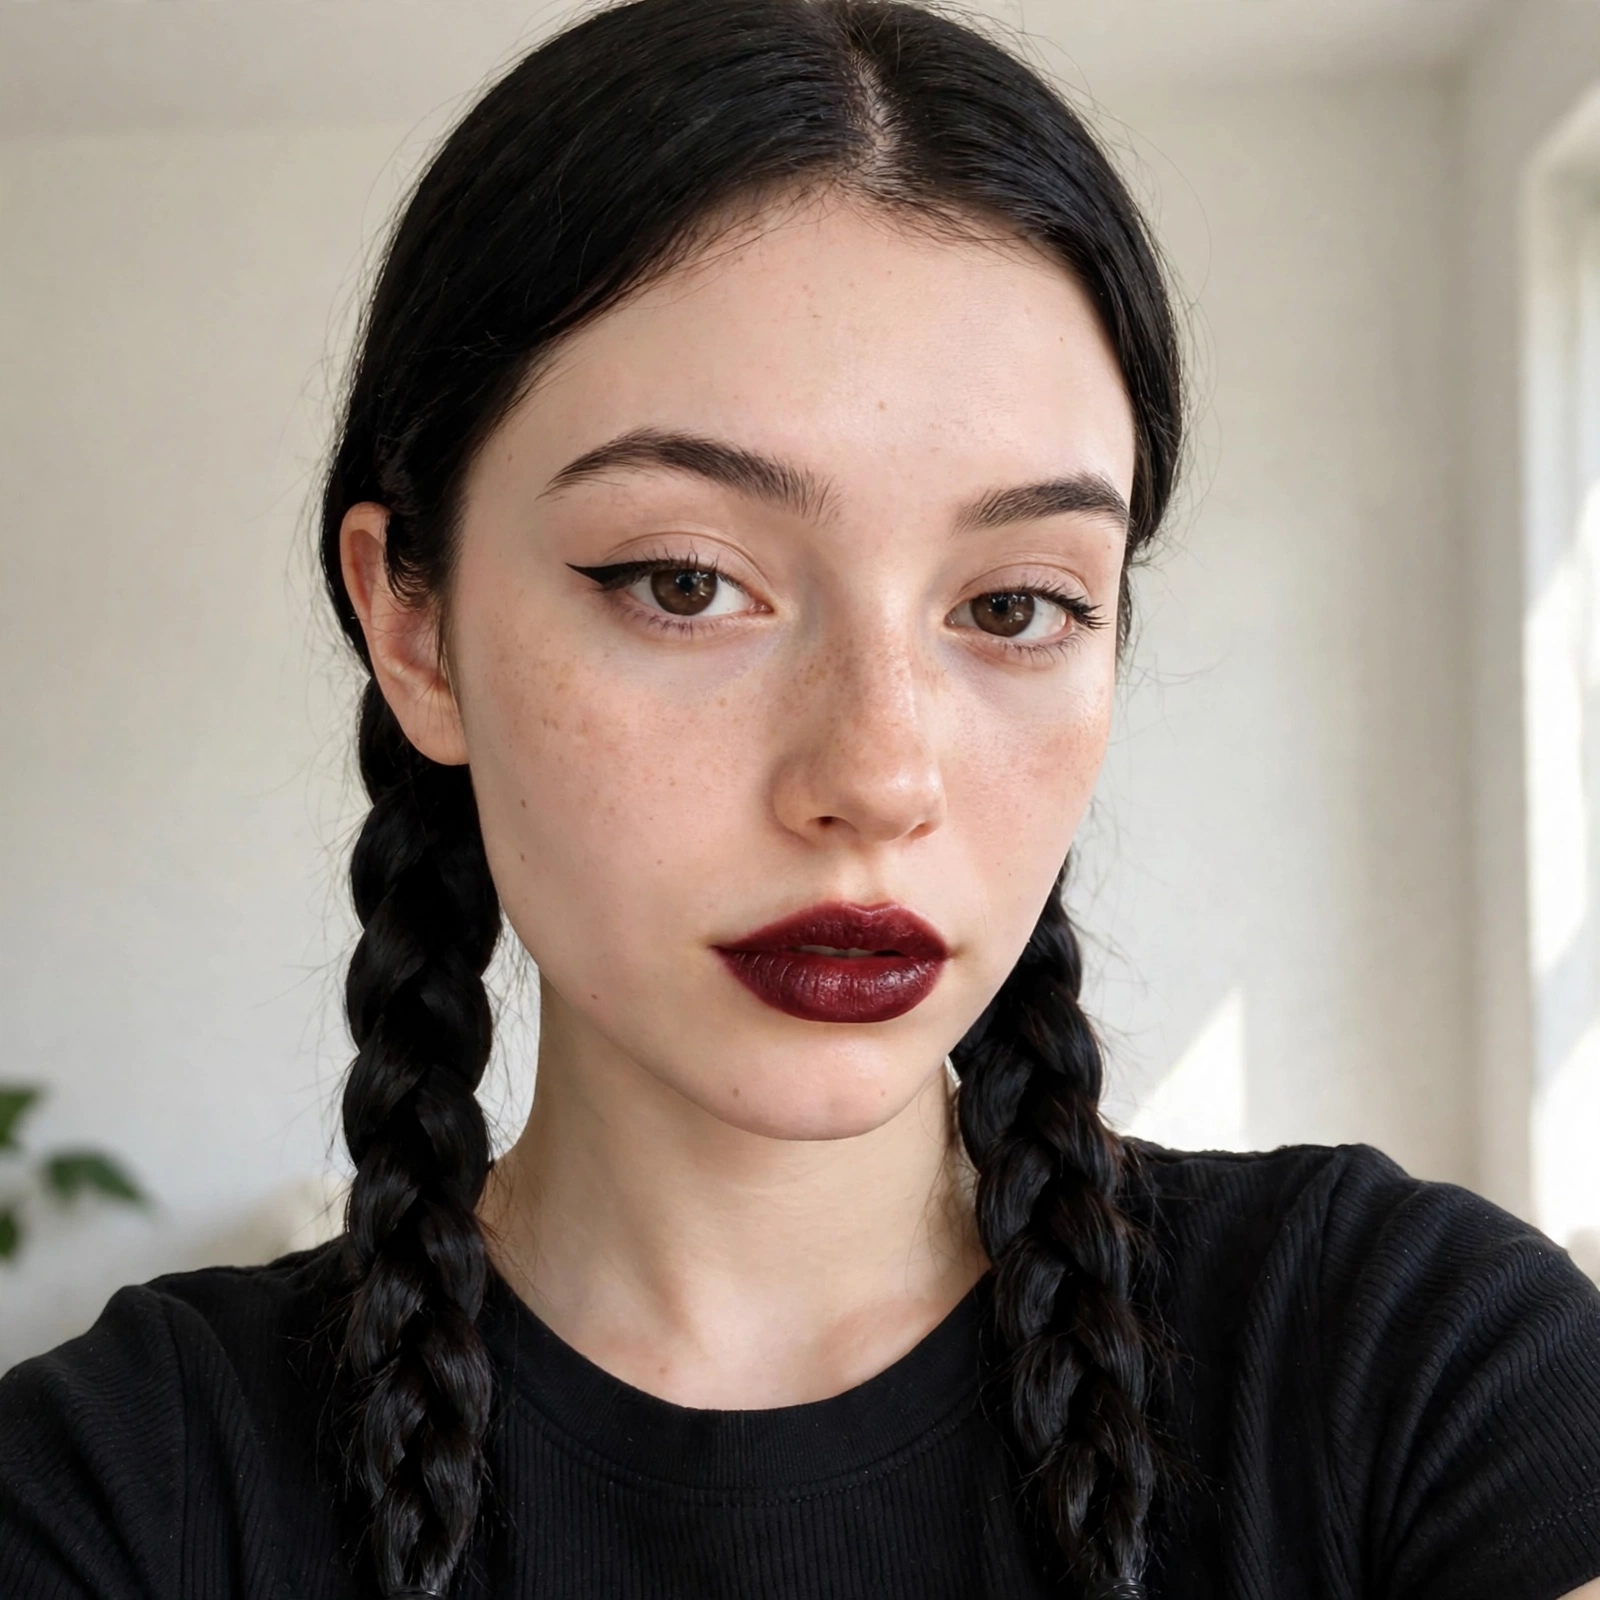
Time: 15 minutes · Est. cost: ~CA$15–20 (if you need the liner and lip)
Key products: NYX Professional Makeup Epic Ink Liner — 01 Black (~CA$14), Maybelline Super Stay Ink Crayon — Berry Wine (~CA$13), your usual foundation one shade lighter than your skin.
🛒 The full supply list:
Chances are you own most of this already. Here’s the full list with Canadian prices:
- Foundation 1 shade lighter than your skin — your usual foundation in a paler shade, or mix your foundation with a drop of white concealer. (~CA$0 if you own it)
- Black liquid eyeliner — NYX Professional Makeup Epic Ink Liner — 01 Black (~CA$14 at Shoppers Drug Mart)
- Cool gray or taupe eyeshadow — any matte gray-brown shade for contouring. An old contour palette works perfectly.
- Dark berry or near-black lipstick (~CA$13 at Shoppers Drug Mart) — NYX, Maybelline, or whatever you own. Matte formula only (more on that below).
- Brow pencil or dark eyeshadow — to fill brows straight and dark.
- Translucent setting powder — to lock the pale base.
Total cost if buying new: ~CA$15–25. If you own eyeliner and dark lipstick: CA$0.
✏️ The full tutorial — Wednesday in 6 steps:
Step 1: The Pale Base (3 minutes)
Apply your lighter foundation all over your face and neck — Wednesday’s pallor is her signature, but blend past your jawline or you’ll get the dreaded “floating pale face” in photos. Set with a light dusting of translucent powder. Skip full white face paint (it reads costume-shop); 1 shade lighter than your skin is the sweet spot.
Step 2: Straight, Dark Brows (2 minutes)
Wednesday’s brows are straight, dark, and serious — no arch, no lift. Fill in your brows following their natural shape but keep the top edge flat. Extend the tail slightly straighter than usual. This one detail changes your whole expression from friendly to deadpan.
Step 3: The Deadpan Eye (3 minutes)
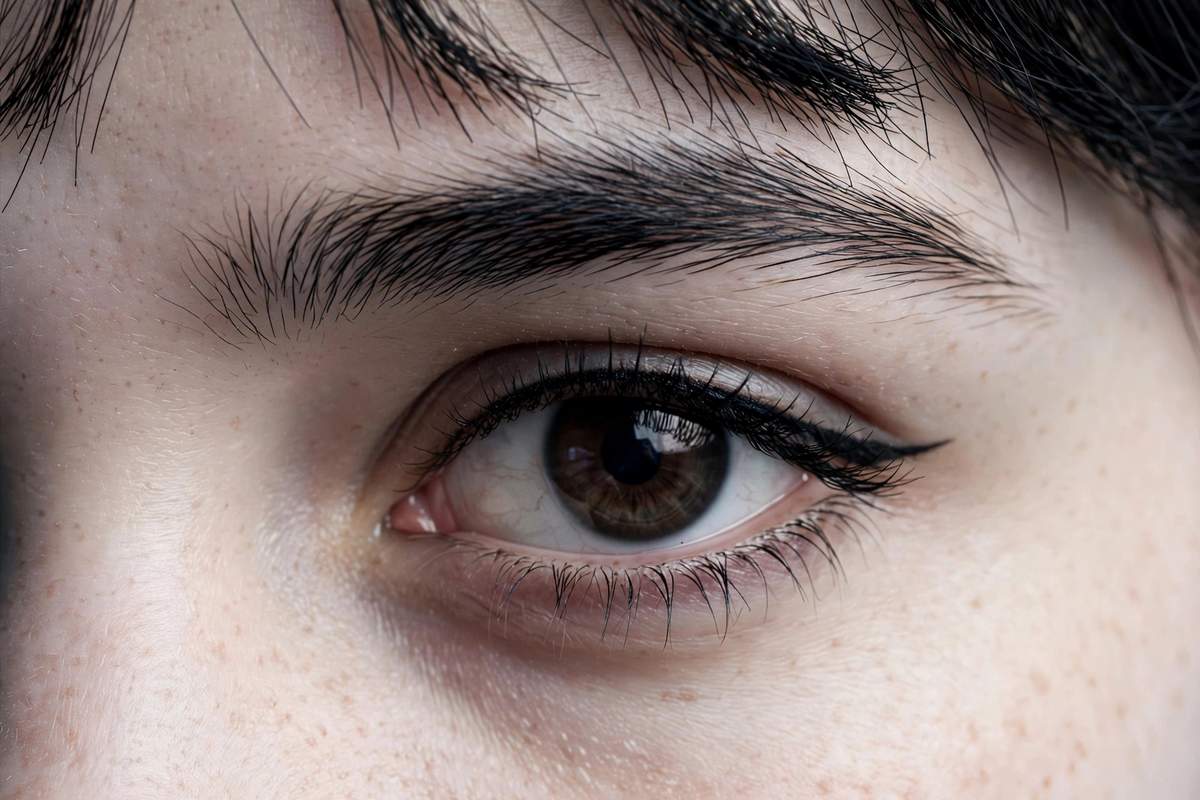
Here’s the beautiful part: Wednesday’s eye makeup is almost nothing. One thin line of black liner on the upper lash line — no wing. Smudge cool gray eyeshadow softly under the lower lash line and inner corner. The goal is “tired and unimpressed,” not “glamorous.” Skip mascara or keep it to one light coat.
Step 4: Hollow Cheeks (2 minutes)
Dust cool gray eyeshadow under your cheekbones, blending upward slightly, plus a touch on temples and the sides of your nose. This creates the gaunt, hollow look that makes Wednesday instantly recognizable. Less is more — you want a shadow, not a contour stripe.
Step 5: The Dark Lip (3 minutes)
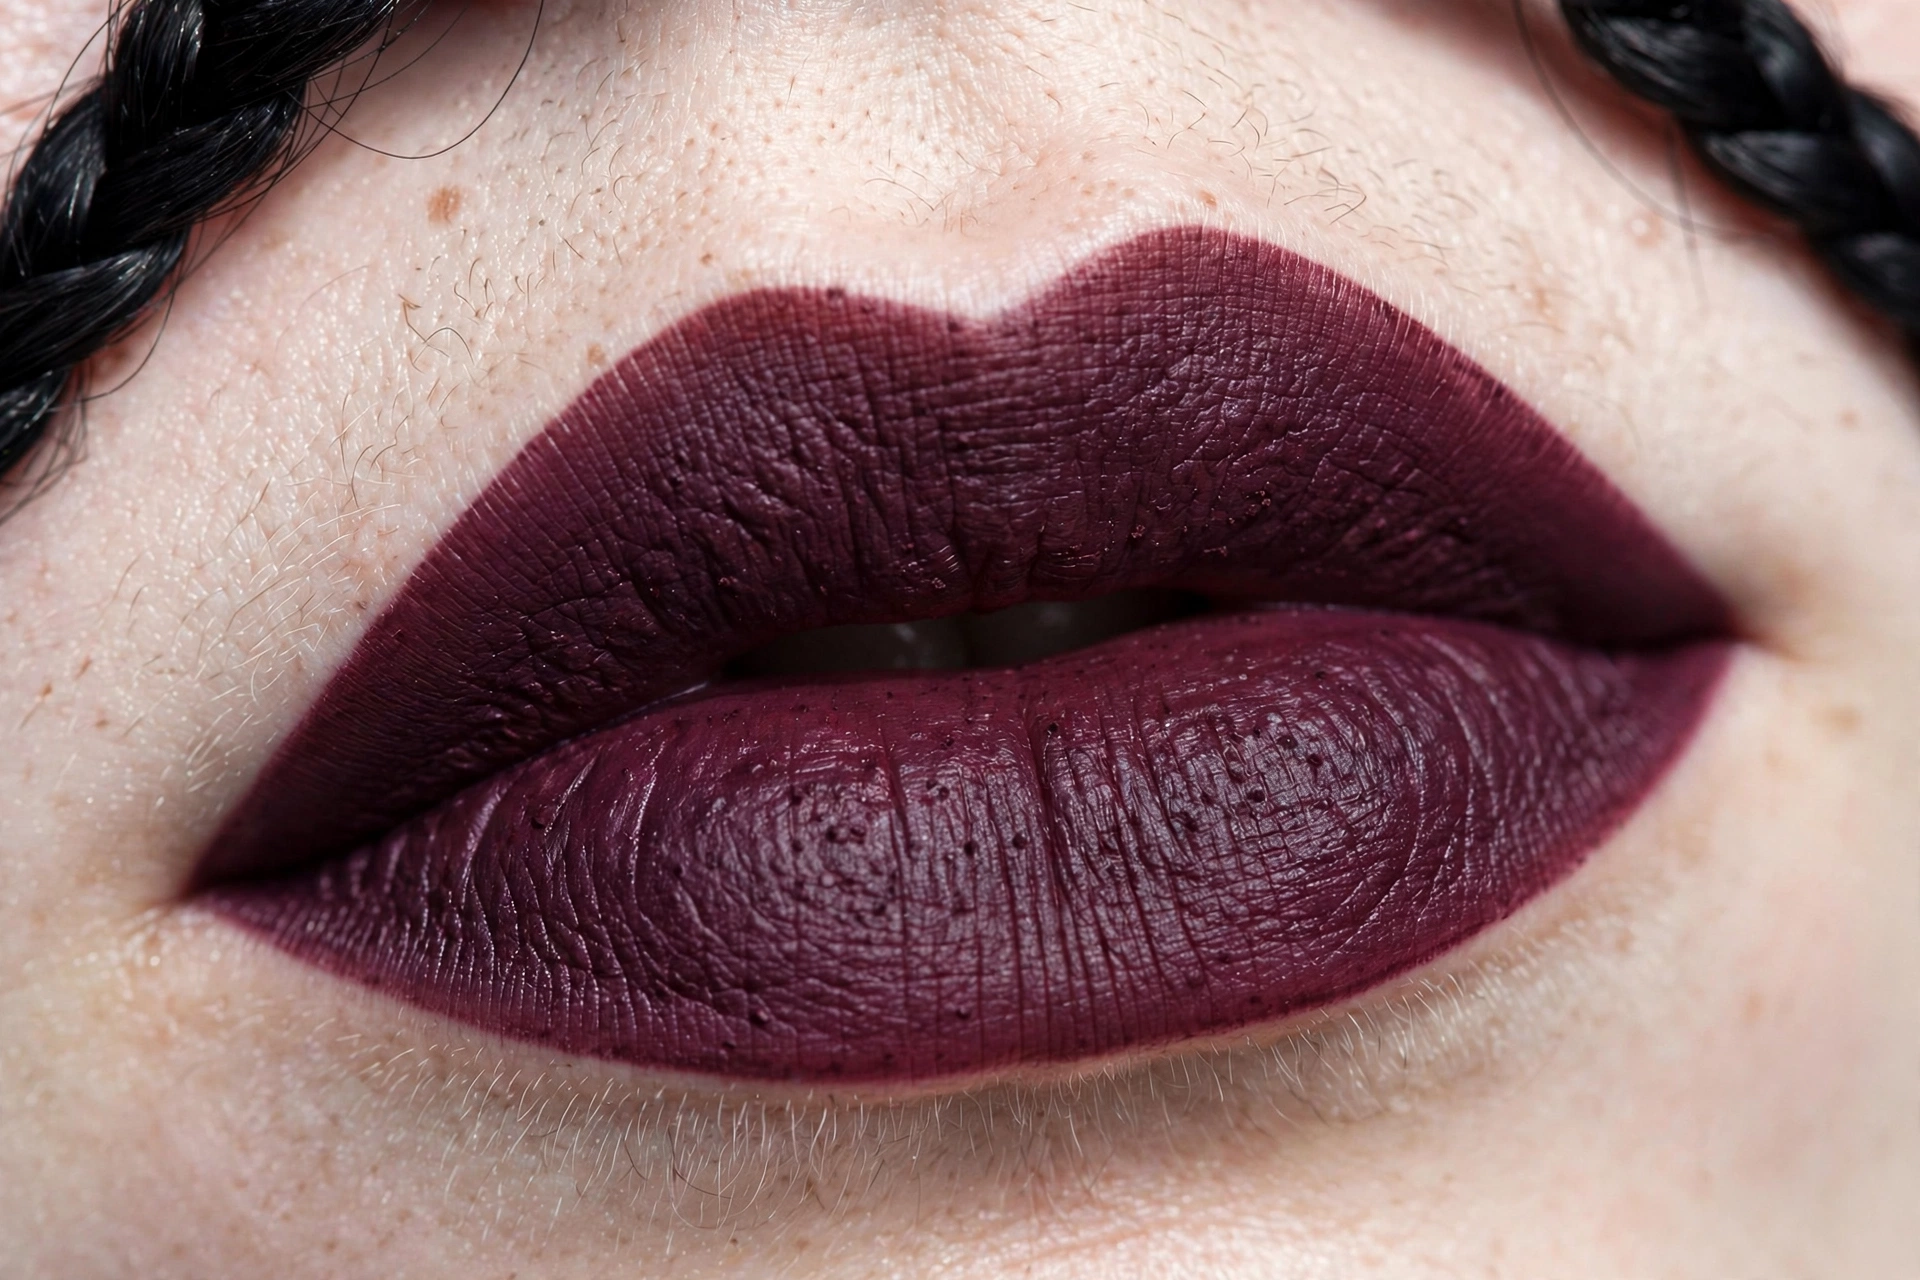
Fill in with your darkest berry or near-black shade. Blot once with a tissue and reapply — it lasts through the whole party without touch-ups. Matte formula is non-negotiable: glossy lips completely break the Wednesday spell.
Step 6: The Braids (2 minutes)
Part your hair down the middle and do two tight, low braids in front of your shoulders. The braids do half the work of this costume — without them, you’re just a pale girl with dark lips. Add a black dress with a white collar if you have one, and you’re done.
💙 Beginner tip: the 2-minute version
Running truly last-minute? Skip steps 2 and 4. Pale base + thin liner + dark lip + braids still reads as Wednesday from across the room. The braids and lips carry 80% of the recognition.
⭐ Tips for a Flawless Finish
- Photograph yourself before leaving. Phone cameras reveal what mirrors hide — check jawline blending and brow symmetry.
- Keep the deadpan expression. Blank stare, slight frown. It’s half the costume.
- Bring the lipstick. Dark lips fade with drinks — one tube in your pocket covers touch-ups.
- Matte everything. Dewy highlighter or glossy lips break character. Wednesday is 100% matte.
⚠️ 5 Beginner Mistakes (and How to Fix Them)
1. Going too pale. Full white face paint looks like a mime, not Wednesday. Fix: stick to 1 shade lighter than your skin, or mix white concealer into your regular foundation.
2. Over-powdering. Too much powder cracks in flash photos. Fix: one light dusting with a fluffy brush — press, don’t sweep.
3. Winged eyeliner. A wing says “glam cat,” not “gothic teen.” Fix: keep the liner line thin and straight, ending exactly at the outer corner.
4. Glossy lips. Even a little shine ruins the moody effect. Fix: blot thoroughly, or press translucent powder over the lipstick through a tissue.
5. Skipping the neck. Pale face + normal neck = instant costume fail in photos. Fix: whatever goes on the face continues down the neck and behind the ears. Every time.
👓 Wednesday With Glasses, Short Hair, or No Braids
Not everyone can — or wants to — do the full braided look. Good news: Wednesday survives every one of these swaps, because the costume is really about the pale matte base, the dark lip, and the expression.
- Wearing glasses? Even easier. Wednesday’s eye makeup is already minimal, so your frames do the visual work her eyeliner would do. Keep the thin upper-lash line, skip shadow under the lower lashes if it fights with your frames, and lean on the hollow cheeks and dark lip instead.
- Short hair? Skip the braids. Do a sharp centre part, tuck both sides behind your ears, and keep everything smooth and flat. The severe parting keeps the Wednesday silhouette.
- No black dress with a white collar? Layer a white collared shirt under any black sweater or cardigan. The white triangle at the neck is the detail people actually recognize.
- Long hair but can’t braid? Two low ponytails brought in front of your shoulders read almost the same in photos — the shape matters more than the weave.
Pick whichever version matches what you already own. Spending money to fix a “problem” Wednesday doesn’t have is the only real mistake here.
🧒 Wednesday for Kids (and Sensitive Skin)
Wednesday is the Halloween request a lot of kids make — and the full adult version is heavier than young skin needs. This gentler version keeps the character and drops the harsh parts.
- Lighten the base. Skip the paler foundation on kids. Their own skin with a light dusting of translucent powder reads pale enough under party lighting, and there is nothing heavy to scrub off at bedtime.
- Swap the liner. Liquid liner near a wiggly child’s eye line is a battle nobody wins. Smudge the same cool gray eyeshadow along the upper lash line instead — softer, faster, and forgiving of a moving target.
- Soften the lip. A dark berry tint or a sheer plum balm gives the Wednesday mood without a full matte lipstick. It also fades evenly instead of cracking.
- Patch-test first. Any new product — costume makeup especially — goes on the inside of the wrist a day ahead. Redness means it stays home.
- Sensitive skin, at any age? Use products your skin already knows and tolerates, and remove everything with a gentle cleanser and lukewarm water. No scrubbing.
The braids, the centre part, and the deadpan face do the heavy lifting at every age. The makeup is just the frame.
❓ Wednesday FAQ
Can I do Wednesday Addams makeup on dark skin?
Can I do Wednesday Addams makeup on dark skin?
Absolutely. The key elements — straight dark brows, thin liner, dark berry lips, braids — work on every skin tone. Focus on a matte, even base in your own shade and let the brows, lips, and braids do the talking.
What if I don’t have Maybelline Super Stay Ink Crayon — Berry Wine?
Berry Wine?Layer what you own: apply your darkest red lipstick, then pat black or dark brown eyeshadow over it with your finger. It creates a convincing near-black lip in a pinch.
Watch out: Matte lips only — glossy lips break the Wednesday spell. Blot with tissue after applying.
🖤 Update: my full Wednesday Addams tutorial now lives right here — the complete supply list, all six steps, beginner mistakes, and the glasses, short-hair, and kids variations are folded into this section.
🐱 2. Glam Cat
The eternal last-minute classic, but make it glam. A sharp wing, whisker dots, and a contoured nose turn “I forgot a costume” into “best dressed.”
Time: 15–20 minutes · Est. cost: ~CA$10–15
Key products: NYX Professional Makeup Epic Ink Liner — 01 Black (~CA$14), bronzer for nose contour, nude-pink lipstick, optional cat-ear headband (~CA$8 at dollar stores).
How to: Do your normal glam base. Draw an extended wing — longer and more dramatic than your everyday liner. Fill in a small black triangle on the tip of your nose. Three whisker dots on each cheek with the liner tip. Contour the sides of your nose. Pink-nude lips keep it cute, not scary.
Watch out: Whiskers smudge fast. Set them with a tiny bit of translucent powder or setting spray.
🩸 3. Last-Minute Vampire
Forgot Halloween is tomorrow? Red lips, smoky eyes, and one drop of fake blood. Done. This is the highest impact-per-minute look on this list.
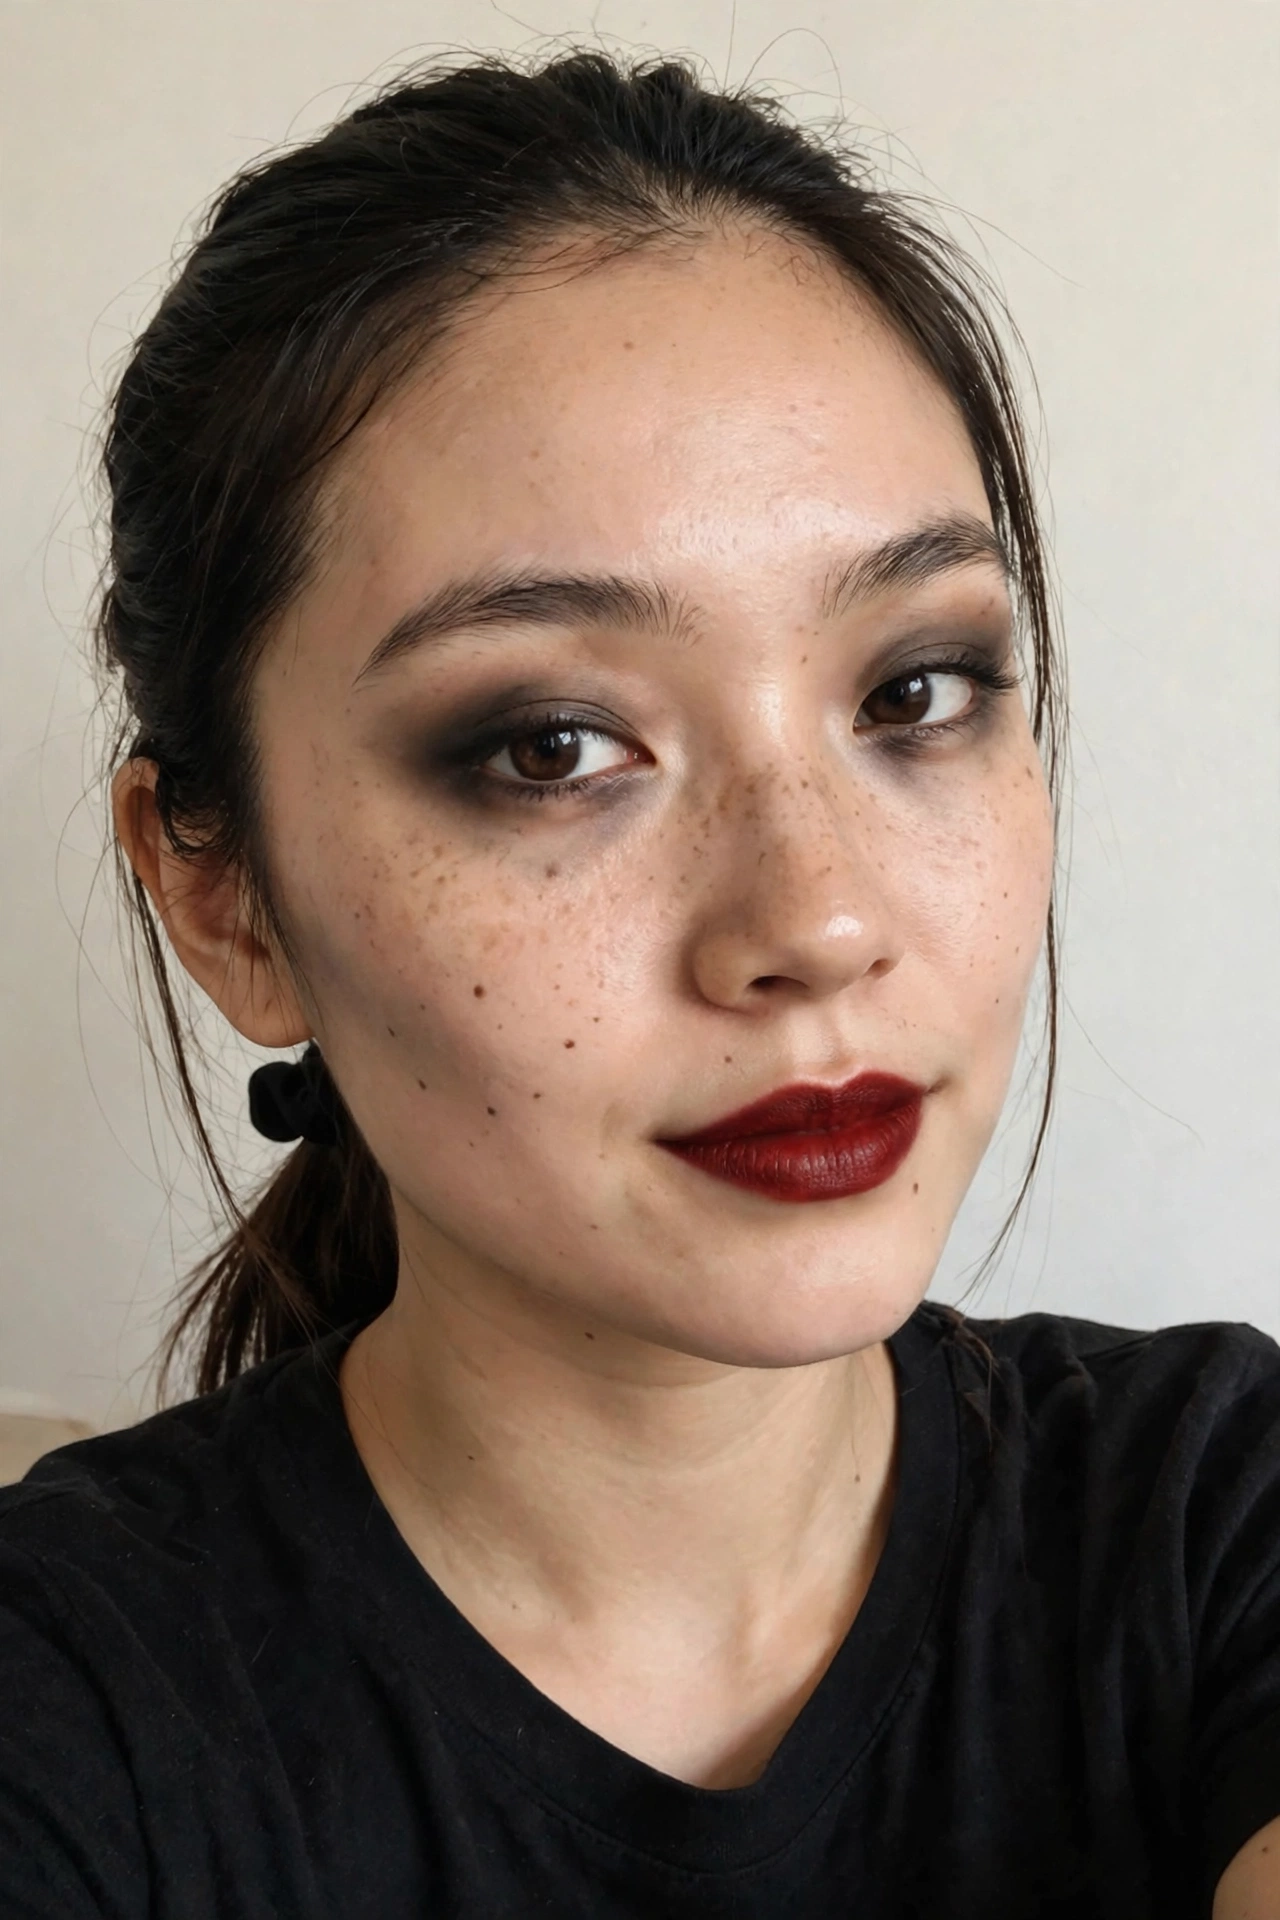
Time: 20 minutes · Est. cost: ~CA$20 (less if you own red lipstick)
Key products: MAC Retro Matte Lipstick — Ruby Woo #707 (~CA$26), dark red or black eyeshadow, optional Ben Nye Stage Blood SB-3 (~CA$7).
How to: Pale base, heavy contour. Smoky eyes using dark red blended into black at the outer corners. Overline your lips slightly and fill with the reddest red you own. Optional: one thin drip of fake blood from the corner of your mouth. Slick your hair back.
Watch out: Fake blood stains everything. Wear black or dark red, and keep it away from light-colored furniture.
✨ 4. Rumi — KPop Demon Hunters
The it-look of Halloween 2026. Netflix’s KPop Demon Hunters made Rumi — purple braid, golden stage makeup, demon-hunter edge — the most searched Halloween look this year. And it’s surprisingly wearable.
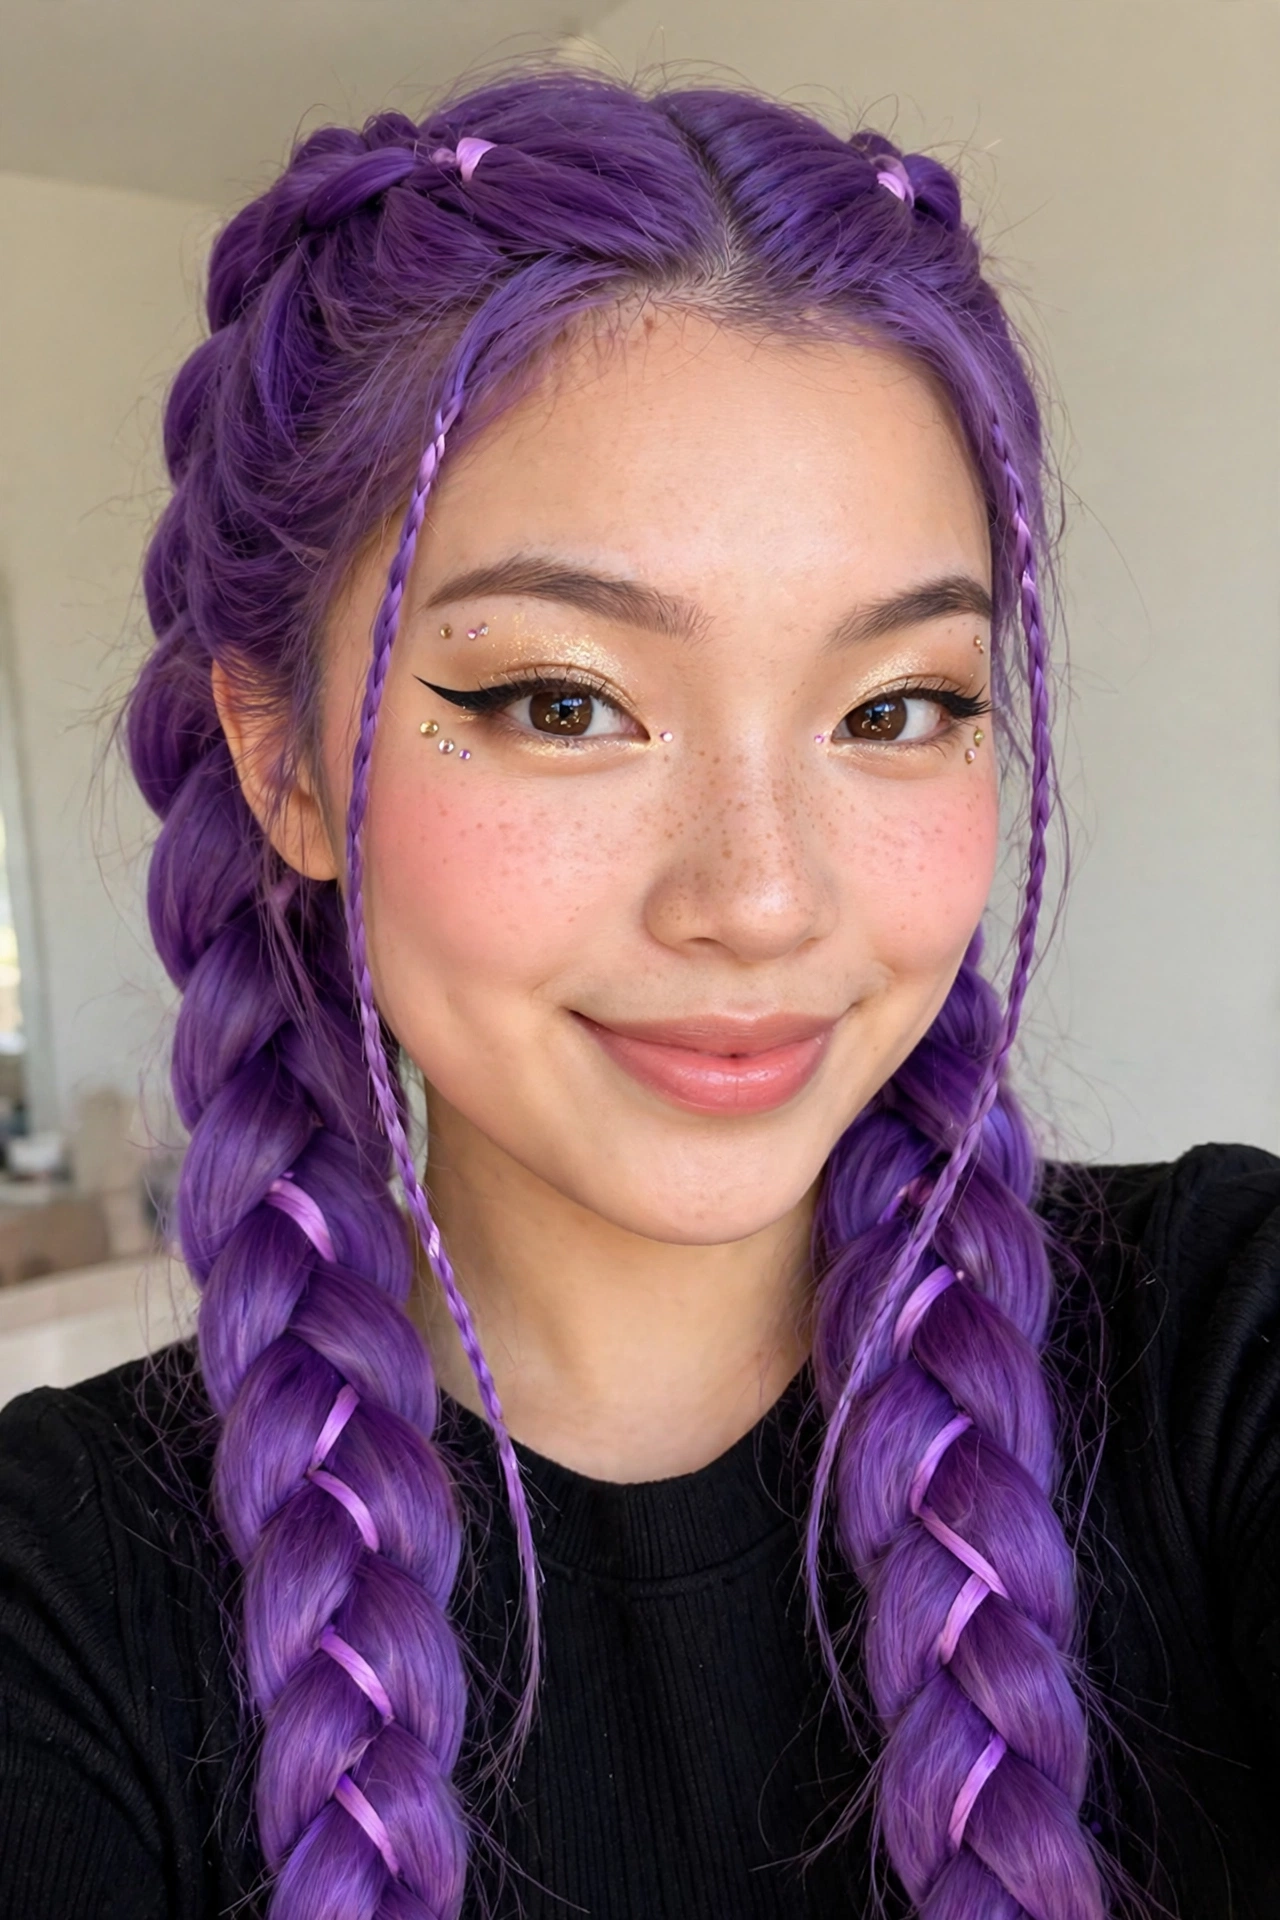
Time: 25 minutes · Est. cost: ~CA$25–35
Key products: Urban Decay 24/7 Moondust Eyeshadow — Space Cowboy (~CA$25), purple temporary hair color spray (L’Oréal ~CA$15), pink blush, black winged liner, face rhinestones from Amazon.ca (~CA$8).
🛍️ The full supply list:
- Gold shimmer eyeshadow — NYX Ultimate Shadow palette (~CA$25 at Shoppers) or any single gold shimmer shadow (~CA$10–14). This is the non-negotiable star of the look.
- Black liquid eyeliner — NYX Epic Ink Liner (~CA$14). For Rumi’s sharp idol wing.
- Pigmented Milani Baked Blush — Dolce Pink — a bright, buildable pink (e.l.f. or NYX, ~CA$8–12). The bolder the pink, the more accurate the look.
- Blurred lip tint or lipstick — a red-pink shade you already own works. Matte or satin finish.
- Face rhinestones — small crystal gems (~CA$8 on Amazon.ca). The detail that sells “idol.”
- Purple temporary hair color spray — L’Oréal Colorista or similar (~CA$15 at Shoppers). One-day color, washes out.
- Your usual foundation, highlighter, and setting spray.
✨ The full tutorial — Rumi in 7 steps:
Step 1 — Skin Prep & Base (3 min)
Rumi’s skin is luminous, not matte. Moisturize, apply your regular foundation or skin tint — don’t go full-coverage — and set only the T-zone lightly. A hydrating primer underneath keeps dry skin dewy for hours.
Step 2 — Gold Shimmer Eyes (5 min)
This is the signature. Apply an eyeshadow primer (or a thin layer of concealer set with powder), then press — don’t sweep — gold shimmer all over the lid with your fingertip or a flat brush. Pressing packs on more pigment. Take the shimmer lightly up to the brow bone and dab a touch on the inner corners. The gold should catch the light every time you blink — that’s the whole point.
Step 3 — The Sharp Wing (5 min)
Rumi’s liner is precise and lifted — pure K-pop idol. Draw a clean wing using the tape trick: place tape from the outer eye corner toward the eyebrow end, draw along it, then peel. Fill the upper lash line fully. Keep the wing sharp and upward — no smudging. Soft gold + sharp black is what makes the eyes look expensive.
Step 4 — Douyin Blush (3 min)
Here’s where most people go wrong: Western blush sits on the apples, but Douyin blush sweeps heavy across the cheeks and straight over the nose bridge, like a sun-kissed stripe. Build in layers with a fluffy brush — start sheer, then add. Rumi wears it bold. If you think you’ve applied enough, add one more layer — it photographs lighter than it looks.
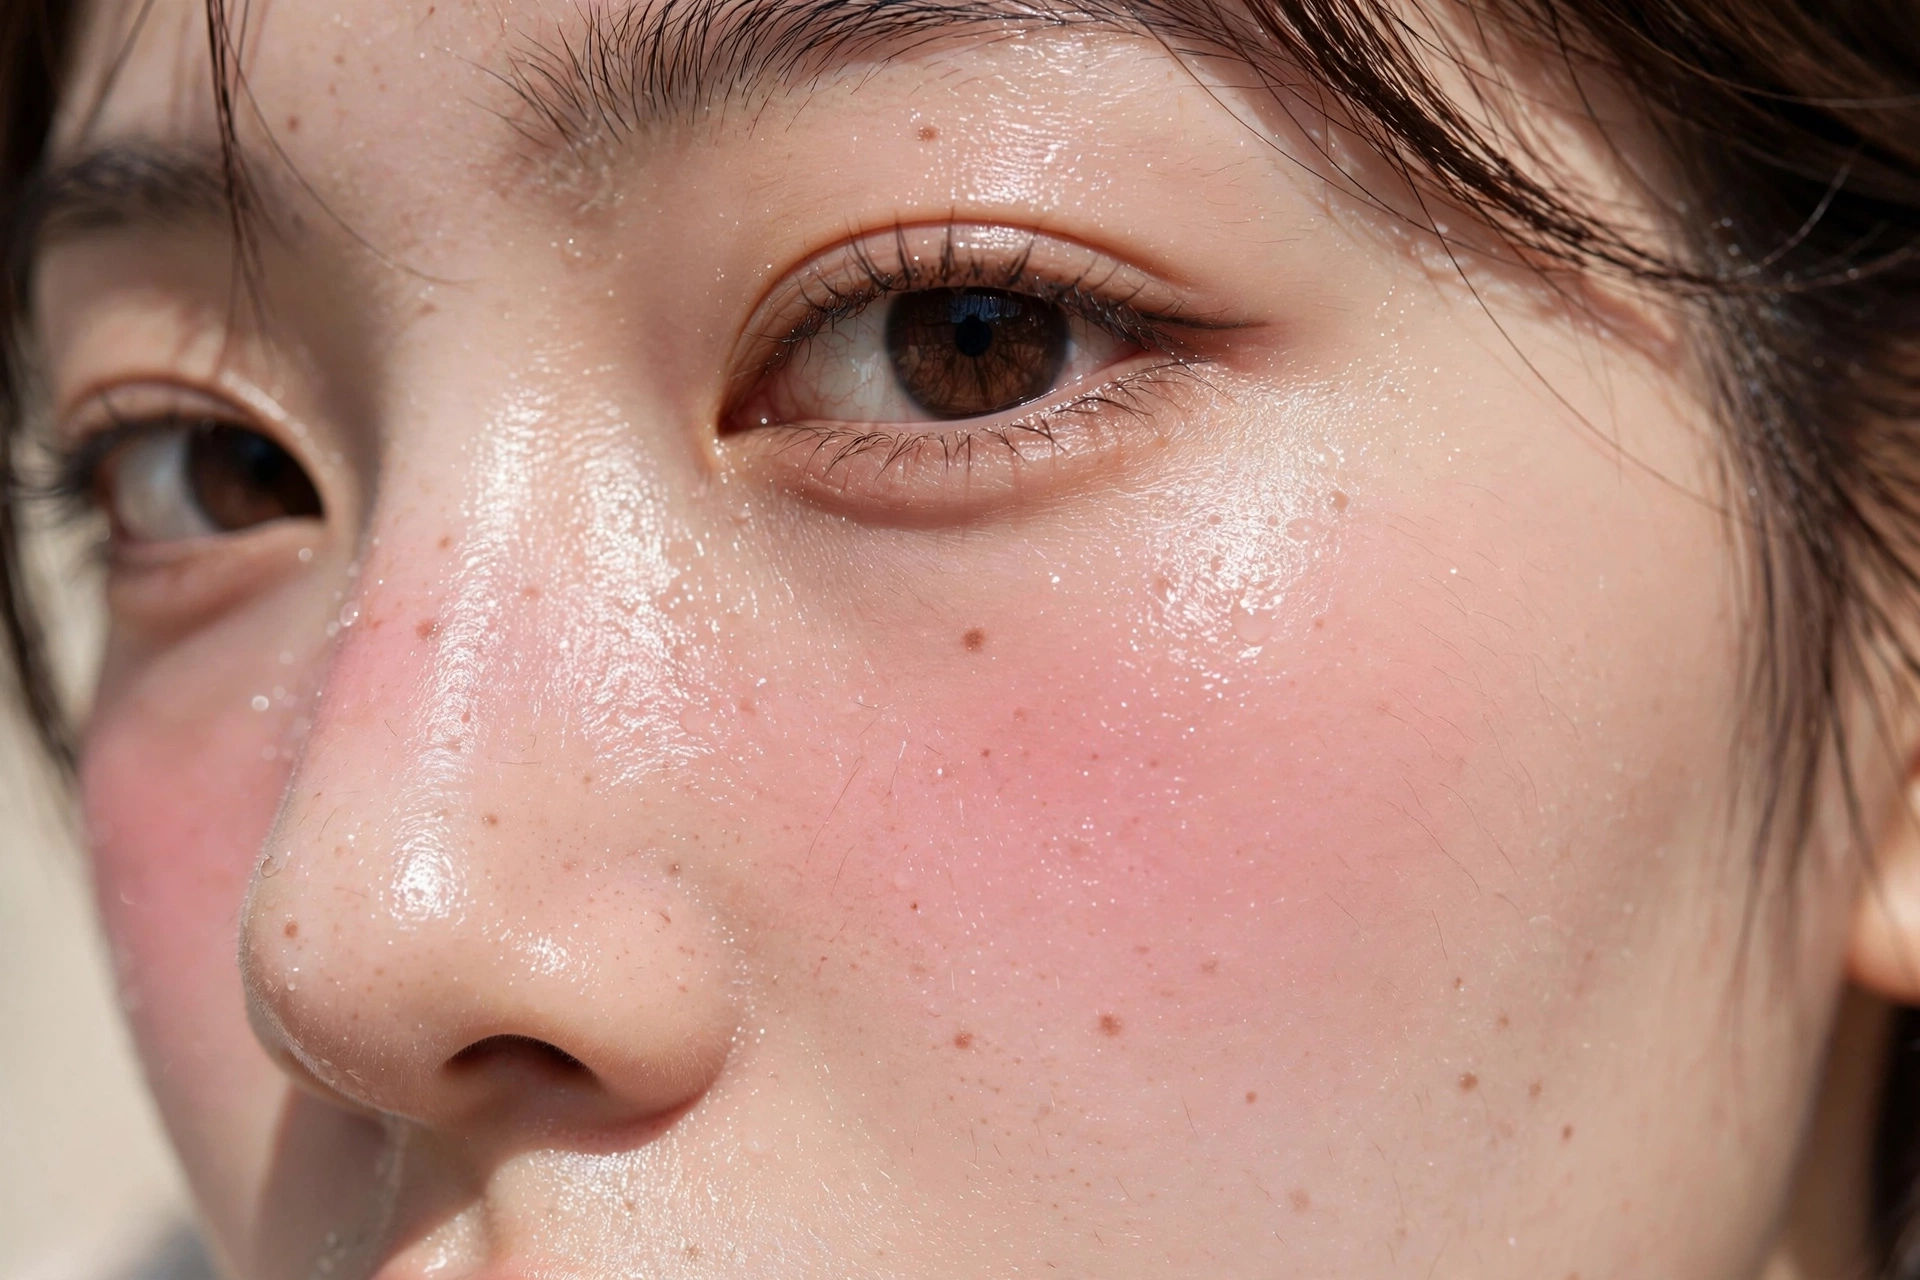
💄 Why the Douyin Blush Placement Matters
If there’s one technique to take away, it’s the blush. The Douyin method — sweeping blush across the nose bridge — looks youthful, photographs beautifully, and instantly reads as idol makeup. Use a pink with some warmth, not a cool blue-pink, or the nose stripe can look like sunburn. Blend the edges with a clean brush, but keep the center pigmented.
Step 5 — Blurred Idol Lips (2 min)
Apply red-pink lipstick, then blot hard with a tissue — twice. Dab a touch more color in the center and blend outward with your fingertip for soft, “just-bitten” lips. Crisp lip liner is the enemy here — Rumi’s lips are always diffused.
Step 6 — Rhinestones & Highlight (3 min)
Stick 2–3 tiny rhinestones at each outer eye corner with a dot of lash glue, along the wing’s edge. Add highlighter to cheekbones, nose tip, and cupid’s bow. Bring spare rhinestones and a mini glue tube — they pop off when you least expect it.
Step 7 — Set Everything (2 min)
Mist setting spray in an X and T motion and let it dry untouched. Shimmer, blush, gems — locked in for the night.
💜 The Purple Braid: Hair Tips
The braid is half the costume — don’t skip it. Gather your hair into a low side braid (Rumi wears hers over one shoulder). Before braiding, spray the lengths with purple temporary color in light, even passes from 20 cm away — heavy bursts look patchy, so go light and build up. Let it dry fully before braiding, or the color transfers to your hands and clothes.
Watch out: temporary hair spray gets everywhere. Wear an old dark top, cover your shoulders with a towel, and wash it out the same night — it stains pillowcases. No long hair? A purple braid wig (~CA$15–20 on Amazon.ca) skips the mess entirely.
🧴 Before the Party: A Two-Minute Skin Check
One honest step before the fun: try the new-to-you pieces a day early. Stick one face gem on the inside of your wrist and leave the adhesive there for a few hours, and spray the purple hair colour on a small hidden strand first. Temporary colour and gem glue are gentle for most people, but Halloween night is the wrong time to discover your skin disagrees — and a dress rehearsal also tells you how the spray behaves on your hair colour before the braid goes in.
Then pack a two-minute rescue kit: a few cotton swabs, your lip tint, and two spare gems in a tiny bag. The wing can be cleaned up with a swab, the lips re-blurred in seconds, and a lost gem replaced before anyone notices. The look is beginner-friendly precisely because every part of it can be repaired in a bathroom mirror.
⏱️ The 25 Minutes, Mapped Backwards
Add the step times up and the tutorial is even tighter than advertised: 3 + 5 + 5 + 3 + 2 + 3 + 2 comes to 23 timed minutes. The other two minutes of the 25 are not padding to waste — step 7 ends with “let it dry untouched,” and drying time is exactly where a rushed look falls apart. Treat those two minutes as the spray setting and a final mirror check, not as extra blending time.
So plan backwards from the door. Need to leave at 7:30? Foundation starts at 7:05, gold eyes by 7:08, wing by 7:13, blush at 7:18, lips at 7:21, gems at 7:23, spray at 7:26 — and hands off until 7:28. If the braid is part of your plan, spray the purple first, before step 1: the colour has to dry fully before braiding anyway, and those drying minutes overlap the base steps instead of adding a second wait at the end. One sitting, one clock, no surprise overruns — that is what makes this a 25-minute look rather than a 45-minute hope.
✨ Update: my full Rumi KPop Demon Hunters tutorial now lives right here — the complete supply list, all seven steps, the Douyin blush deep-dive, hair tips, and the 25-minute plan are folded into this section.
🎨 Intermediate Looks: 40–60 Minutes, Real Impact
Ready to spend a bit more time? These four looks need a steady hand and a few specialty products, but they photograph incredibly well — worth it for the Instagram alone.
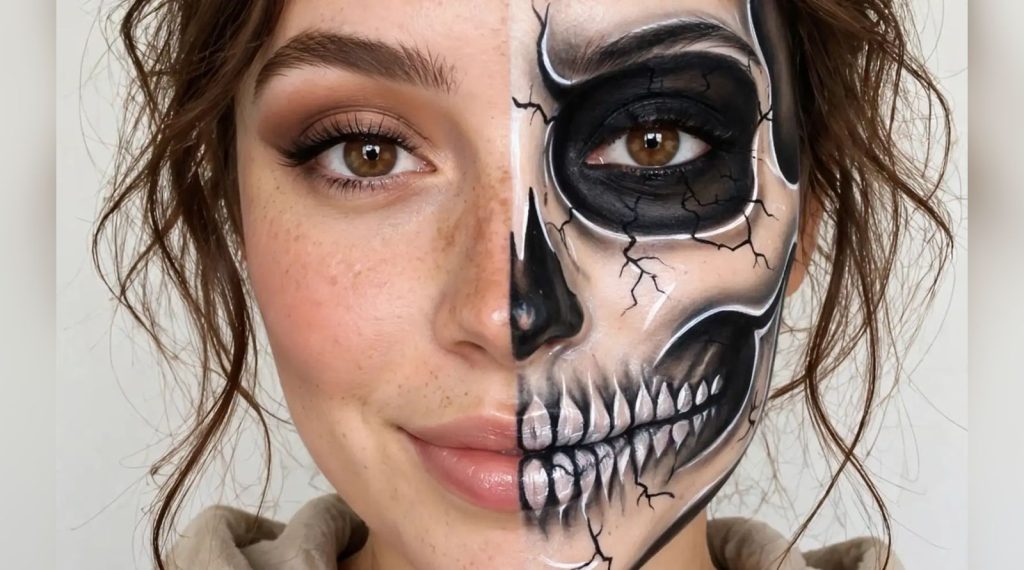
💀 5. Glam Skeleton (Half-Face)
Half glam, half skull. It’s the perfect compromise: one side says “I’m beautiful,” the other says “I’m dead.” A perennial favorite that never looks dated.
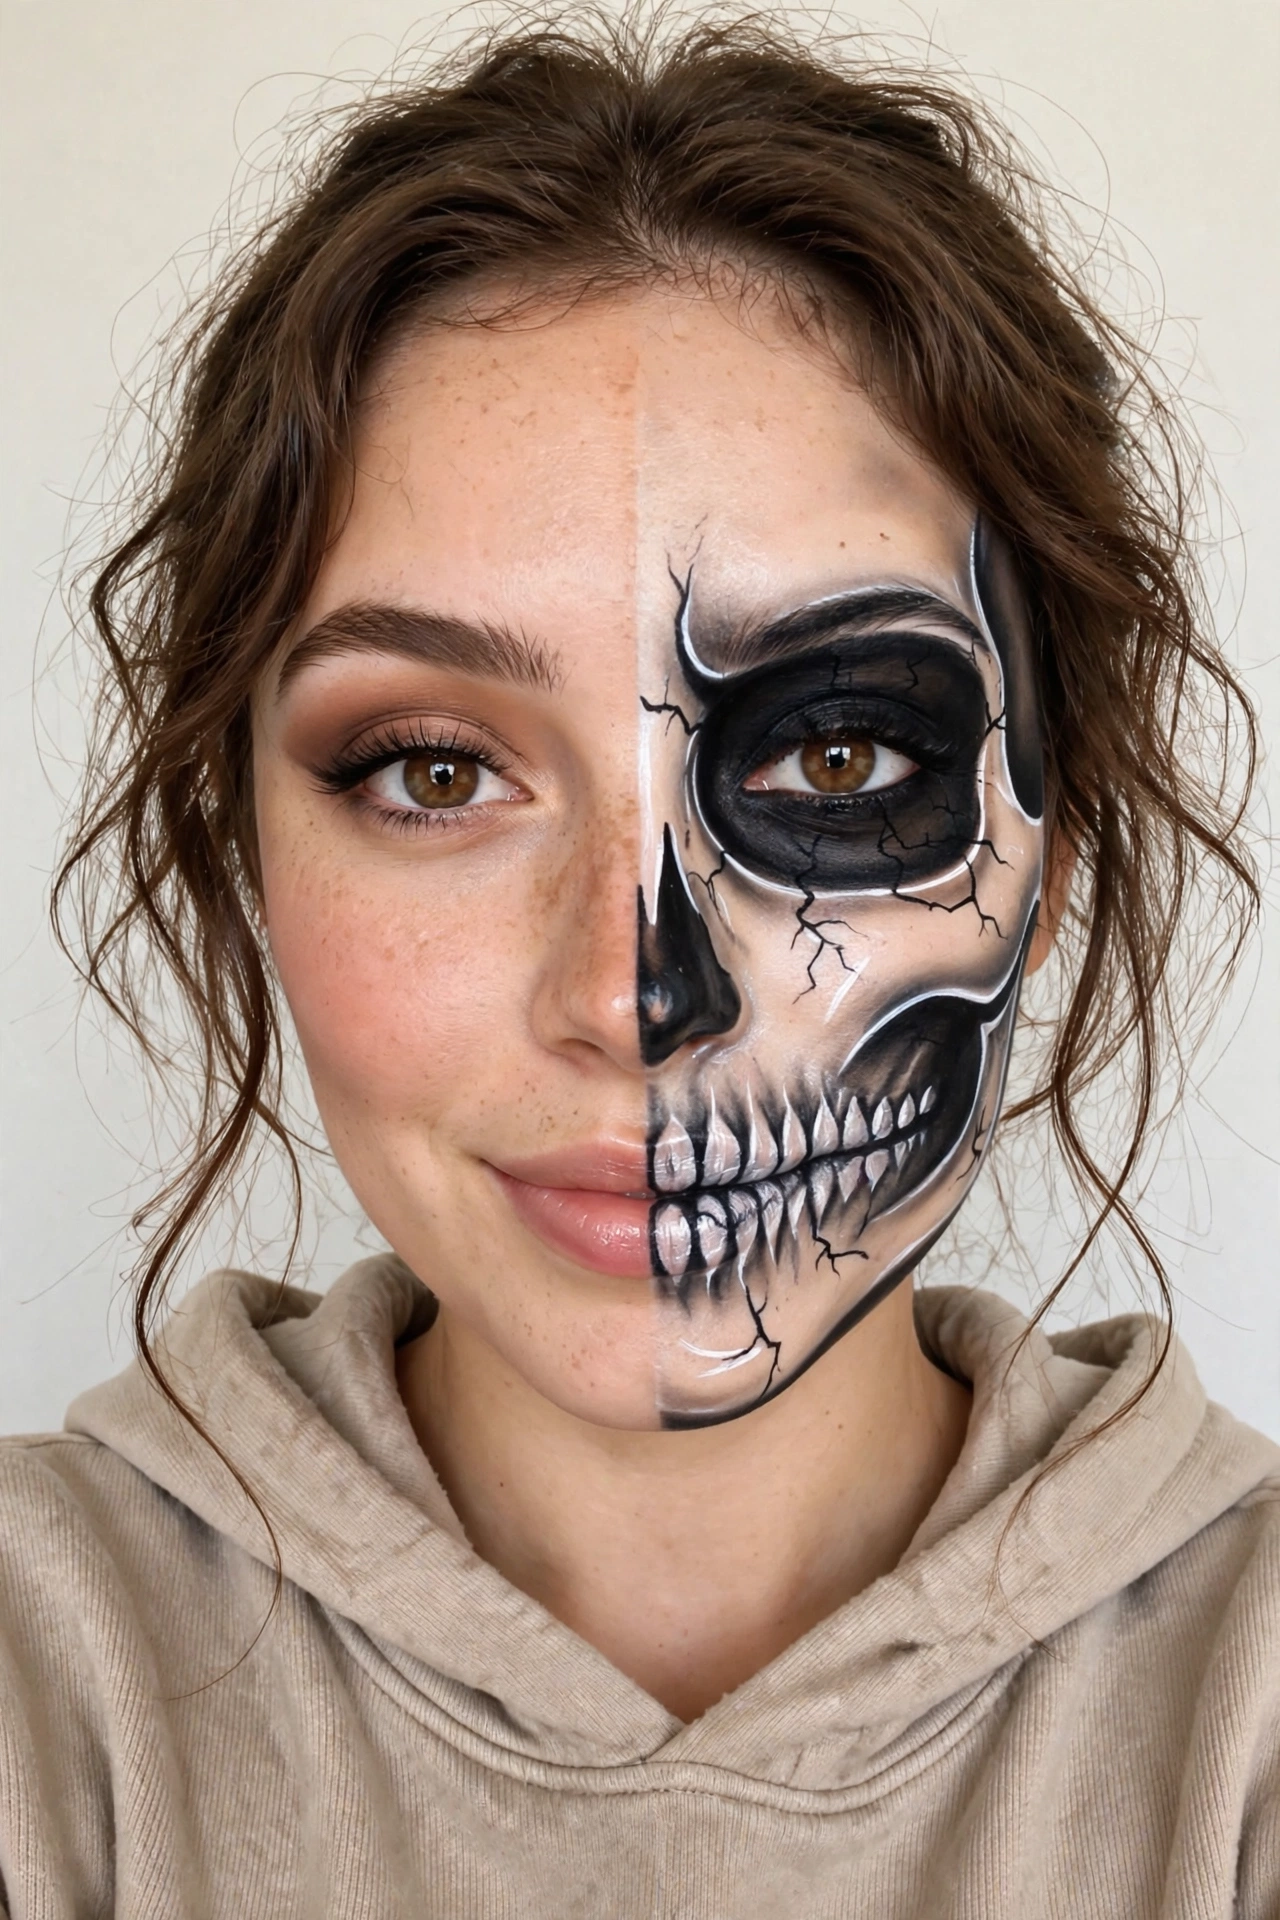
Time: 45–60 minutes · Est. cost: ~CA$25
Key products: Ben Nye crème colors in black & white (~CA$12–15 each), magenta blush (~CA$10), setting powder.
How to: Split your face vertically (use the nose bridge as your guide). Glam side: your best smoky eye and nude lip. Skull side: white base, black hollowed eye socket, black nose triangle, vertical teeth lines across the lips extending into “cracks” on the cheek. Blend the dividing line slightly so it doesn’t look taped on.
Watch out: Crème colors move. Set everything with powder and setting spray, and don’t touch your face all night.
🎎 6. Creepy Doll
Porcelain skin, oversized blush circles, painted-on lower lashes, and crack lines. Creepy dolls are huge this year because the look is equal parts cute and deeply unsettling.
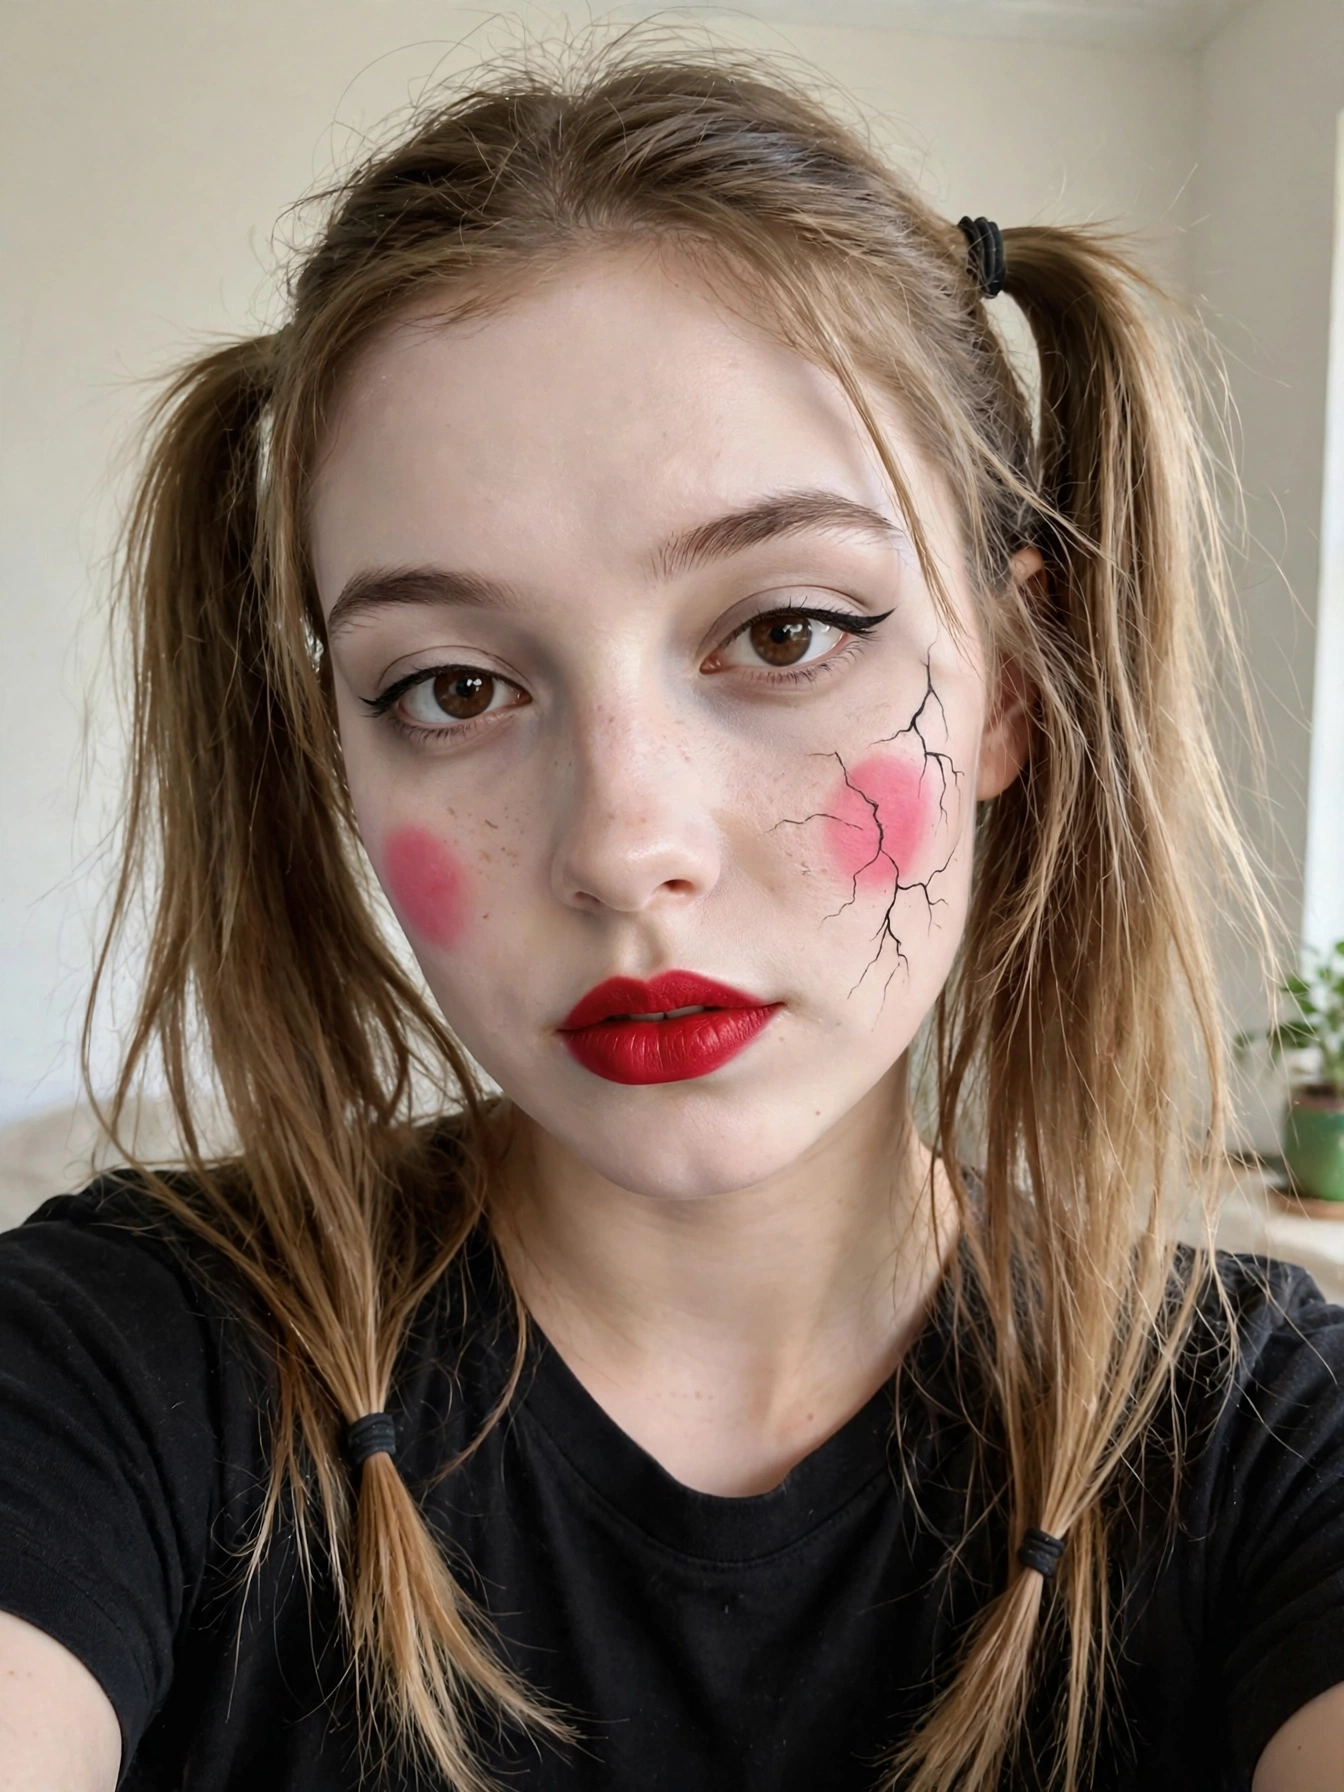
Time: 40 minutes · Est. cost: ~CA$20–25
Key products: pale foundation or white crème (~CA$14), pink blush, brown-black liner for cracks, red lipstick, white eyeliner.
How to: Matte porcelain base — go 1–2 shades lighter than usual. Big round pink blush circles on the apples of your cheeks. Draw exaggerated lower lashes with white liner below your real lash line. Thin crack lines: one from the corner of an eye, one from the corner of the mouth. Glossy red lips. Pigtails or a bow help sell it.
Watch out: Crack lines are the make-or-break detail. Keep them thin and slightly uneven — too perfect looks drawn-on, too thick looks messy.
🧙 7. Wicked Witch of the West
Green skin is a commitment, but nothing reads “Halloween” faster. With Wicked still fresh in everyone’s mind, this look gets instant recognition.
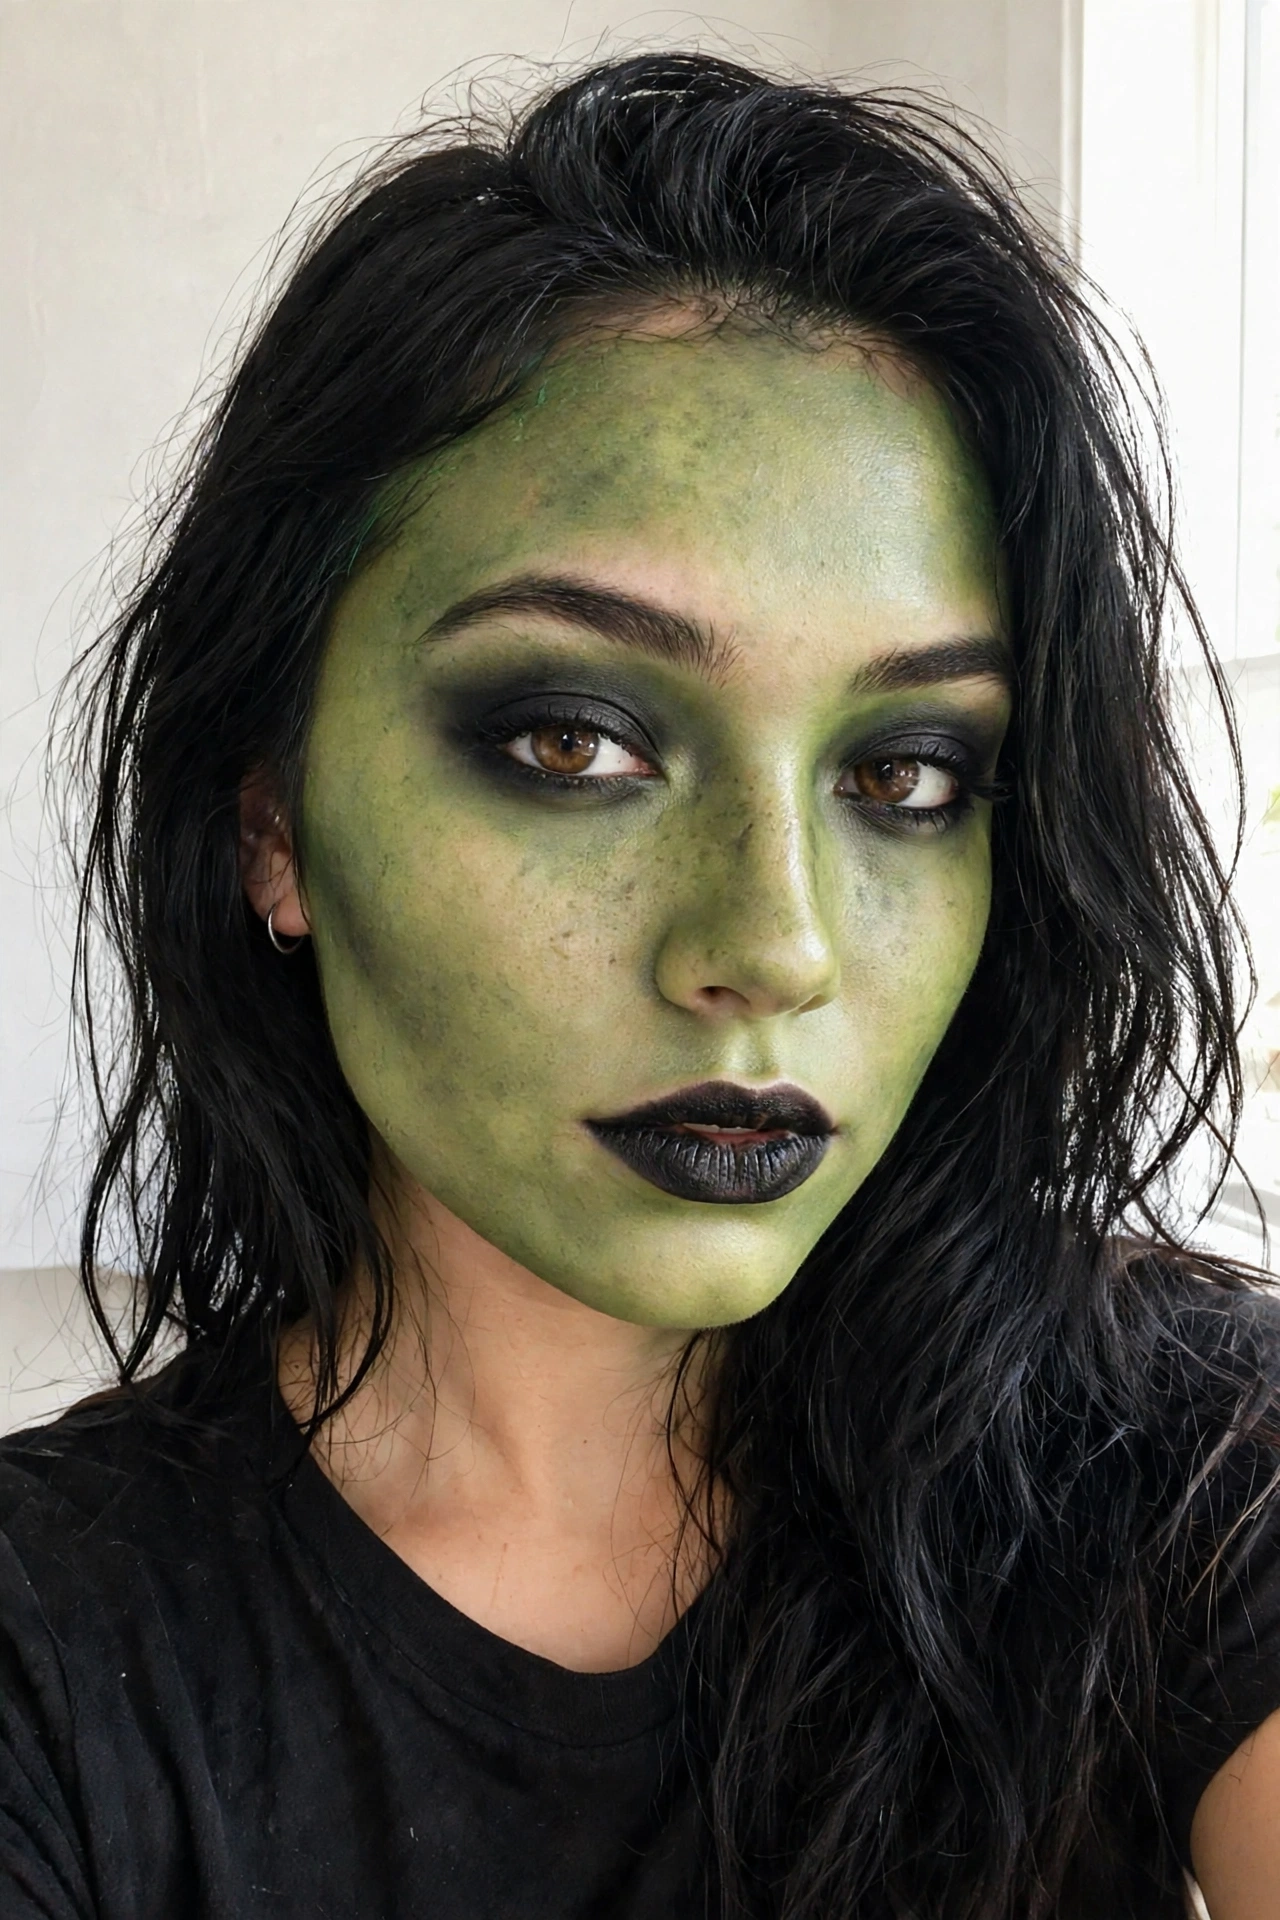
Time: 45 minutes · Est. cost: ~CA$25
Key products: Mehron Paradise Makeup AQ — Dark Green (~CA$26), black for contour, dark smoky palette, deep red or black lipstick.
How to: Green crème all over face and neck (mismatched neck ruins it). Highlight forehead, under-eyes, and cheekbones with white crème; contour cheekbones and jaw with black. Dark smoky eyes, sharp brows. Deep red lips — or black if you’re feeling bold. Optional tiny black beauty marks dotted on the cheeks.
Watch out: Apply moisturizer as a barrier first — green pigment stains skin. Remove with a cleansing balm or oil, never scrub with a regular cleanser.
🤖 8. Cyberpunk / Y3K Silver Star
For the futuristic crowd. Metallic silver, neon graphic lines, holographic highlight — this is the “high-tech ghost” look all over TikTok, and it glows under party lights.
Time: 40 minutes · Est. cost: ~CA$25–30
Key products: metallic silver pigment (~CA$12), neon liquid liner (~CA$14), holographic highlighter, dark or chrome lipstick.
How to: Prime well. Press silver pigment onto lids, inner eye corners, and cheekbones. Draw sharp geometric neon lines — think circuit patterns along the temples or under the eyes. Holographic highlighter on every high point of the face. Dark lips ground the whole look.
Watch out: Metallics crease without primer. Use an eyeshadow primer or even a thin layer of concealer set with powder first.
🔥 Advanced Looks: 60+ Minutes, Showstopper Level
These two are for the committed. They take time, practice, and a few pro products — but you’ll be the person everyone photographs.
🧟 9. Realistic Zombie (Bruise Wheel Technique)
Forget green face paint. Real zombies are about bruising — layered purples, greens, and yellows that look like actual trauma. A bruise color wheel is the pro secret.
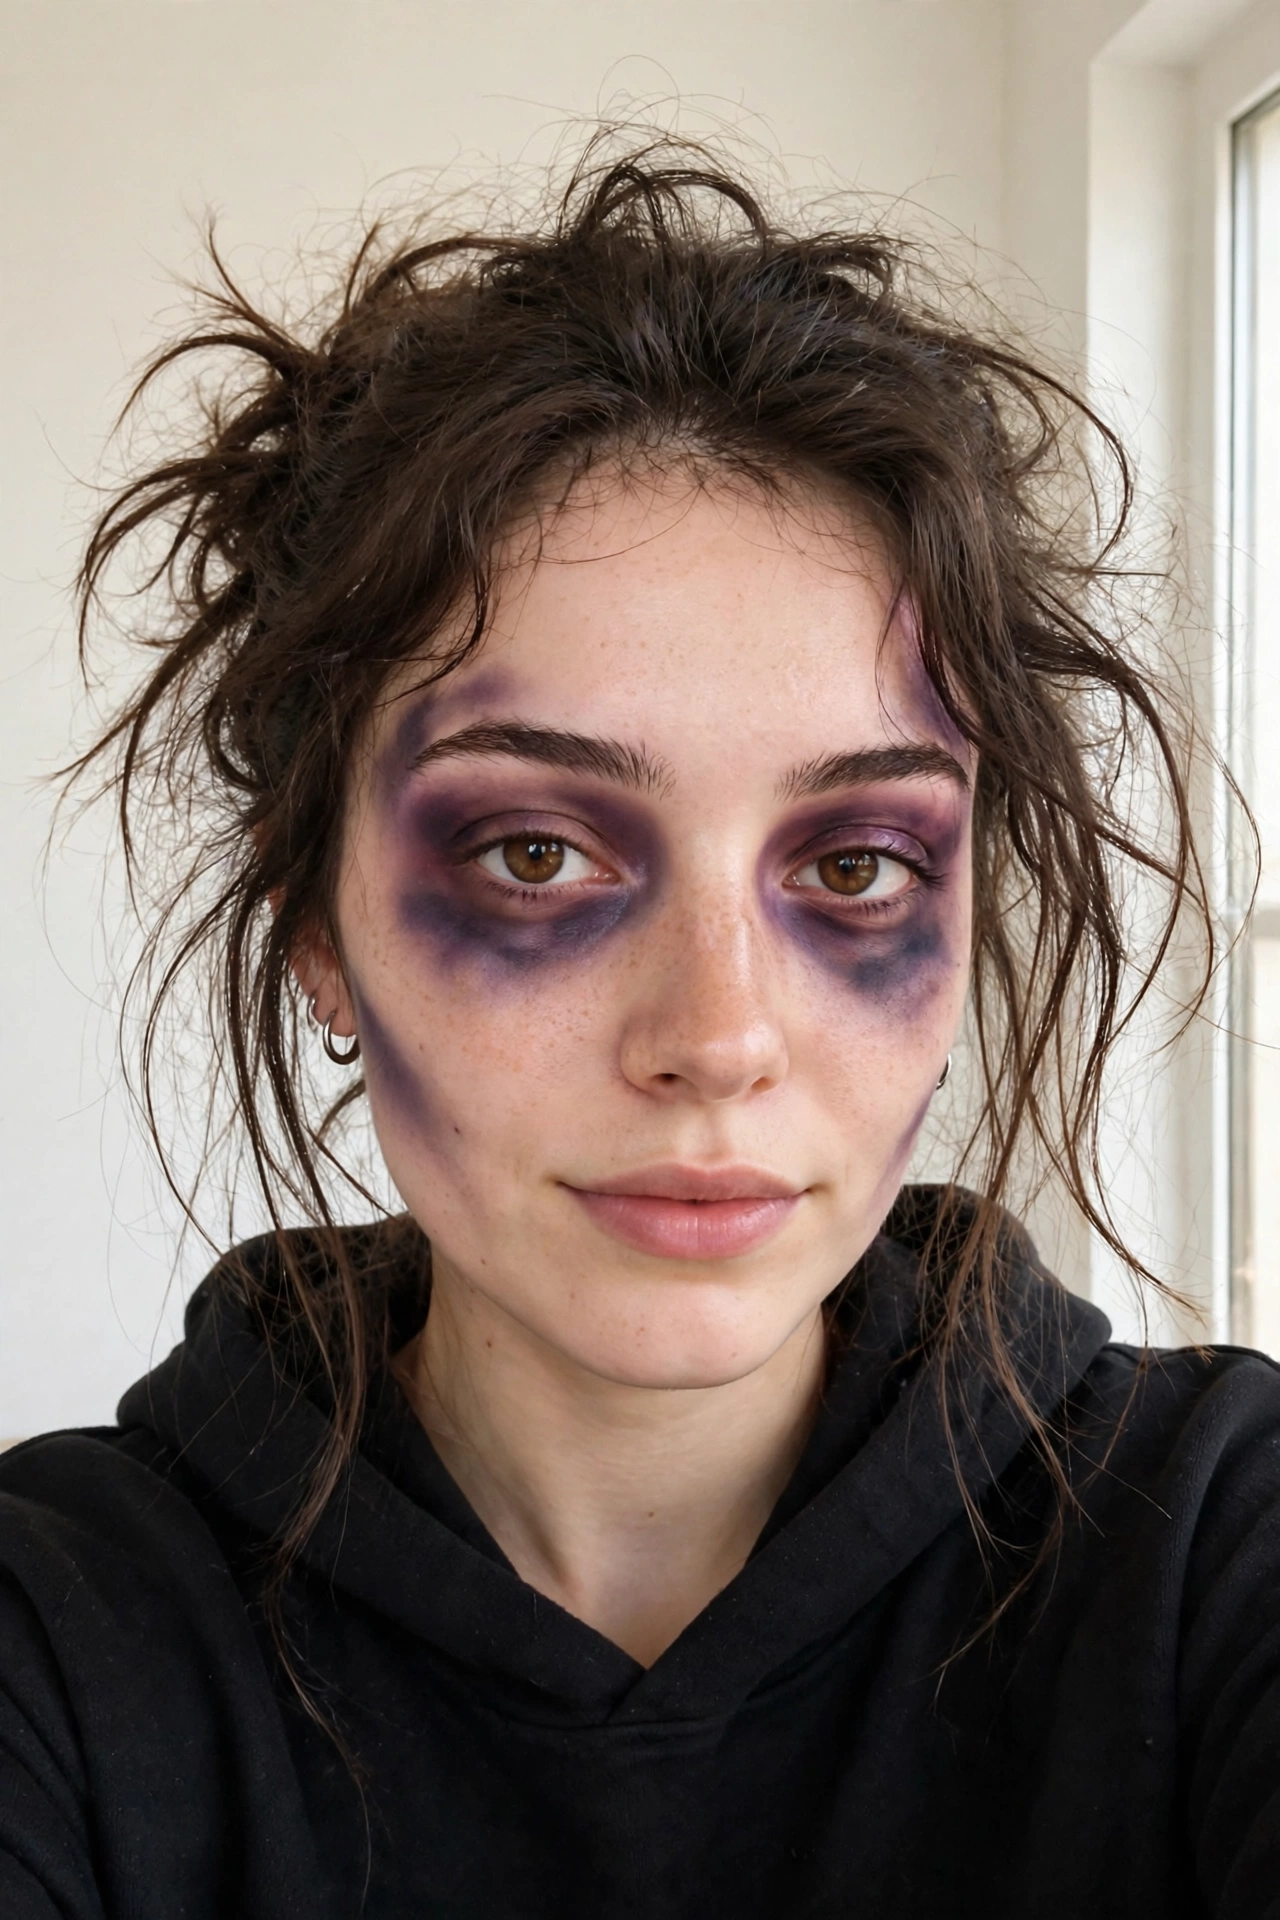
Time: 60–90 minutes · Est. cost: ~CA$30
Key products: Narrative Cosmetics 6-Color Bruise Wheel (US$16), Ben Nye Thick Blood (~CA$13), black and dark red eyeshadow, eyeliner and mascara you own.
How to: Start with a pale, slightly gray-green base. Layer bruise colors: purple in the deepest hollows (under eyes, temples), green around the edges, yellow on the outer rims — real bruises have all three. Dark, sunken eyes with black shadow. Mess up your hair. Add blood drips last: from the mouth, a scratch on the forehead, torn “wound” on the neck.
Watch out: Less is more with blood — a few well-placed drips beat a full-face smear. And again: fake blood stains. Dark costume only.
🔘 10. Coraline’s Other Mother
Button eyes. Two words, instant chills. This look is all about precision — perfectly symmetrical black buttons with thread details — and it’s unforgettable in person.
Time: 60+ minutes · Est. cost: ~CA$20
Key products: black gel eyeliner or face paint (~CA$12–14), white face paint for base (~CA$14), yellow-brown eyeshadow, nude lipstick.
How to: Pale matte base. Draw large black circles over your closed-eye area — these are the buttons. Add four small holes and crisscross “thread” lines in each. Subtle brown contour to hollow the cheeks. Keep everything else minimal: nude lips, neat brows. A short black bob wig (~CA$15 on Amazon.ca) makes it instantly recognizable.
Watch out: Symmetry is everything. Measure, sketch lightly first, and step back from the mirror often. Rush this and it falls apart.
⚡ Bonus: 5 Last-Minute Ideas (Under 5 Minutes Each)
Party in an hour? These need almost nothing.
🦇 11. Bat-Wing Liner
Draw your normal wing, then add a small scalloped “bat wing” flick at the outer corner. Black liner only. Two minutes.
🩸 12. Vampire Bite
Two small red dots on the neck + one thin blood drip. Pair with red lips. Three minutes.
🌾 13. Scarecrow Stitch
Extend your lip line past the corners with vertical “stitch” ticks. Add a triangle nose. Brown liner. Four minutes.
🦌 14. Doe / Deer
Brown nose tip, white spots on cheeks and forehead, big fluttery lashes. Brown and white liner. Five minutes.
🧻 15. Mummy
Dark smoky eyes, pale lips, and loosely wrapped gauze strips (medical gauze, ~CA$5) around the head. Five minutes.
💙 Sensitive skin? Read this first
- Patch test 24 hours before — dab new products on your jawline and wait a day.
- Choose fragrance-free, hypoallergenic products where possible.
- Moisturizer first as a barrier, especially under face paint or crème colors.
- Remove with a cleansing balm or oil — never scrub. Double cleanse after heavy looks.
- Skip face paint on broken, irritated, or freshly exfoliated skin.
✏️ How to Draw Like a Pro: Essential Techniques
You don’t need to be an artist. You just need the right technique. These are the fundamental skills that make every Halloween look on this list achievable — even if you’ve never done more than basic eyeliner.
Winged Liner That Doesn’t Take 20 Tries
The tape trick: Place a small piece of Scotch tape from the outer corner of your eye toward the end of your eyebrow. Draw your wing along the tape edge, then peel it off. Perfect sharp wing in 10 seconds. For cat looks and Rumi’s sharp wing, this is non-negotiable for beginners.
The dot-to-line method: Instead of drawing one continuous line (which wobbles), place 3–4 small dots where you want the line to go, then connect them. Works for whiskers, crack lines, and stitch marks too.
Blending Without Muddy Colors
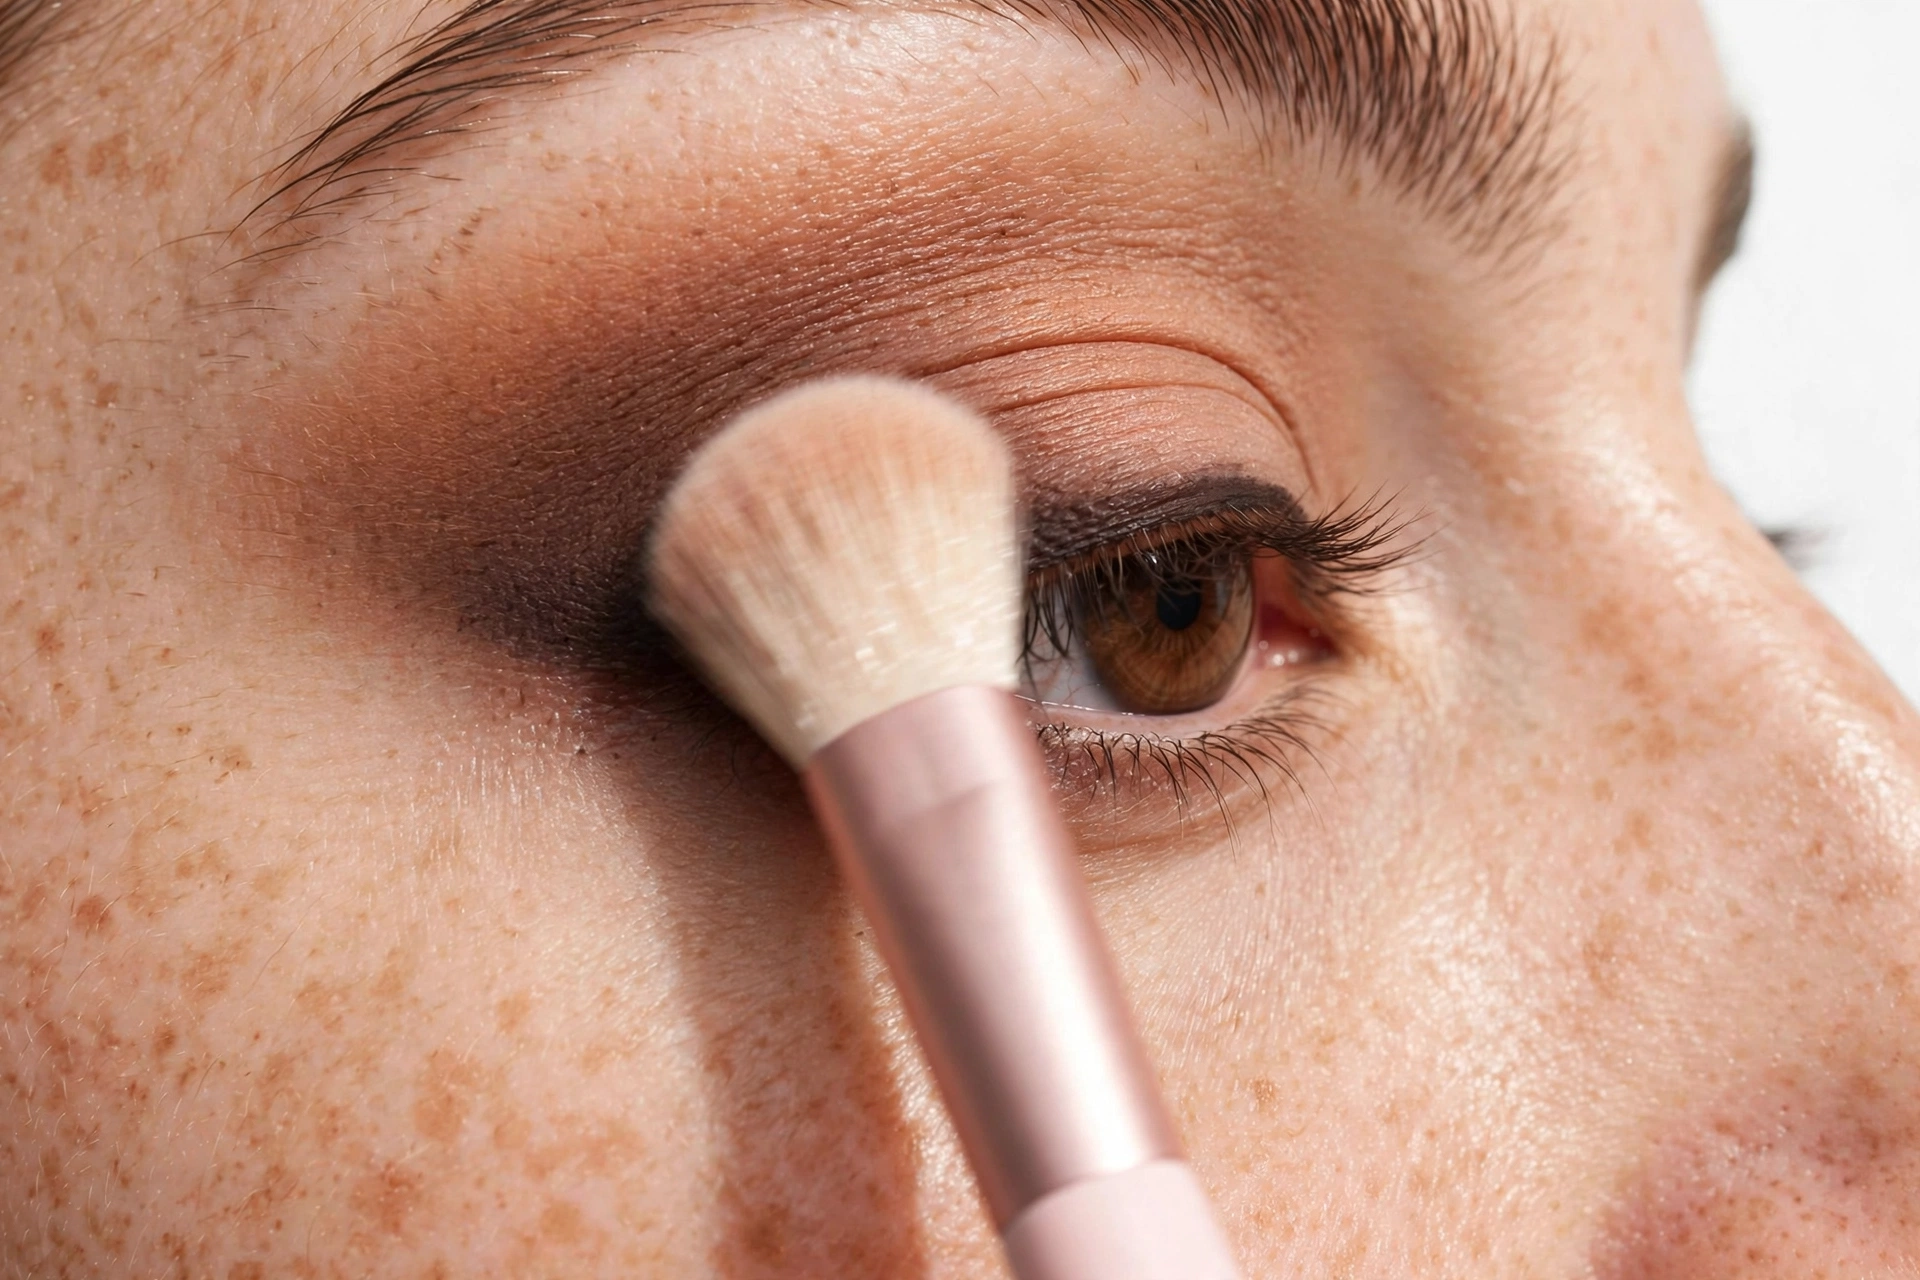
The #1 beginner mistake is over-blending until everything turns gray-brown. Use a clean fluffy brush for blending — never the same brush you applied color with. Blend in small circles, not back-and-forth strokes. And stop sooner than you think — you can always blend more, but you can’t un-blend.
Symmetry Secrets
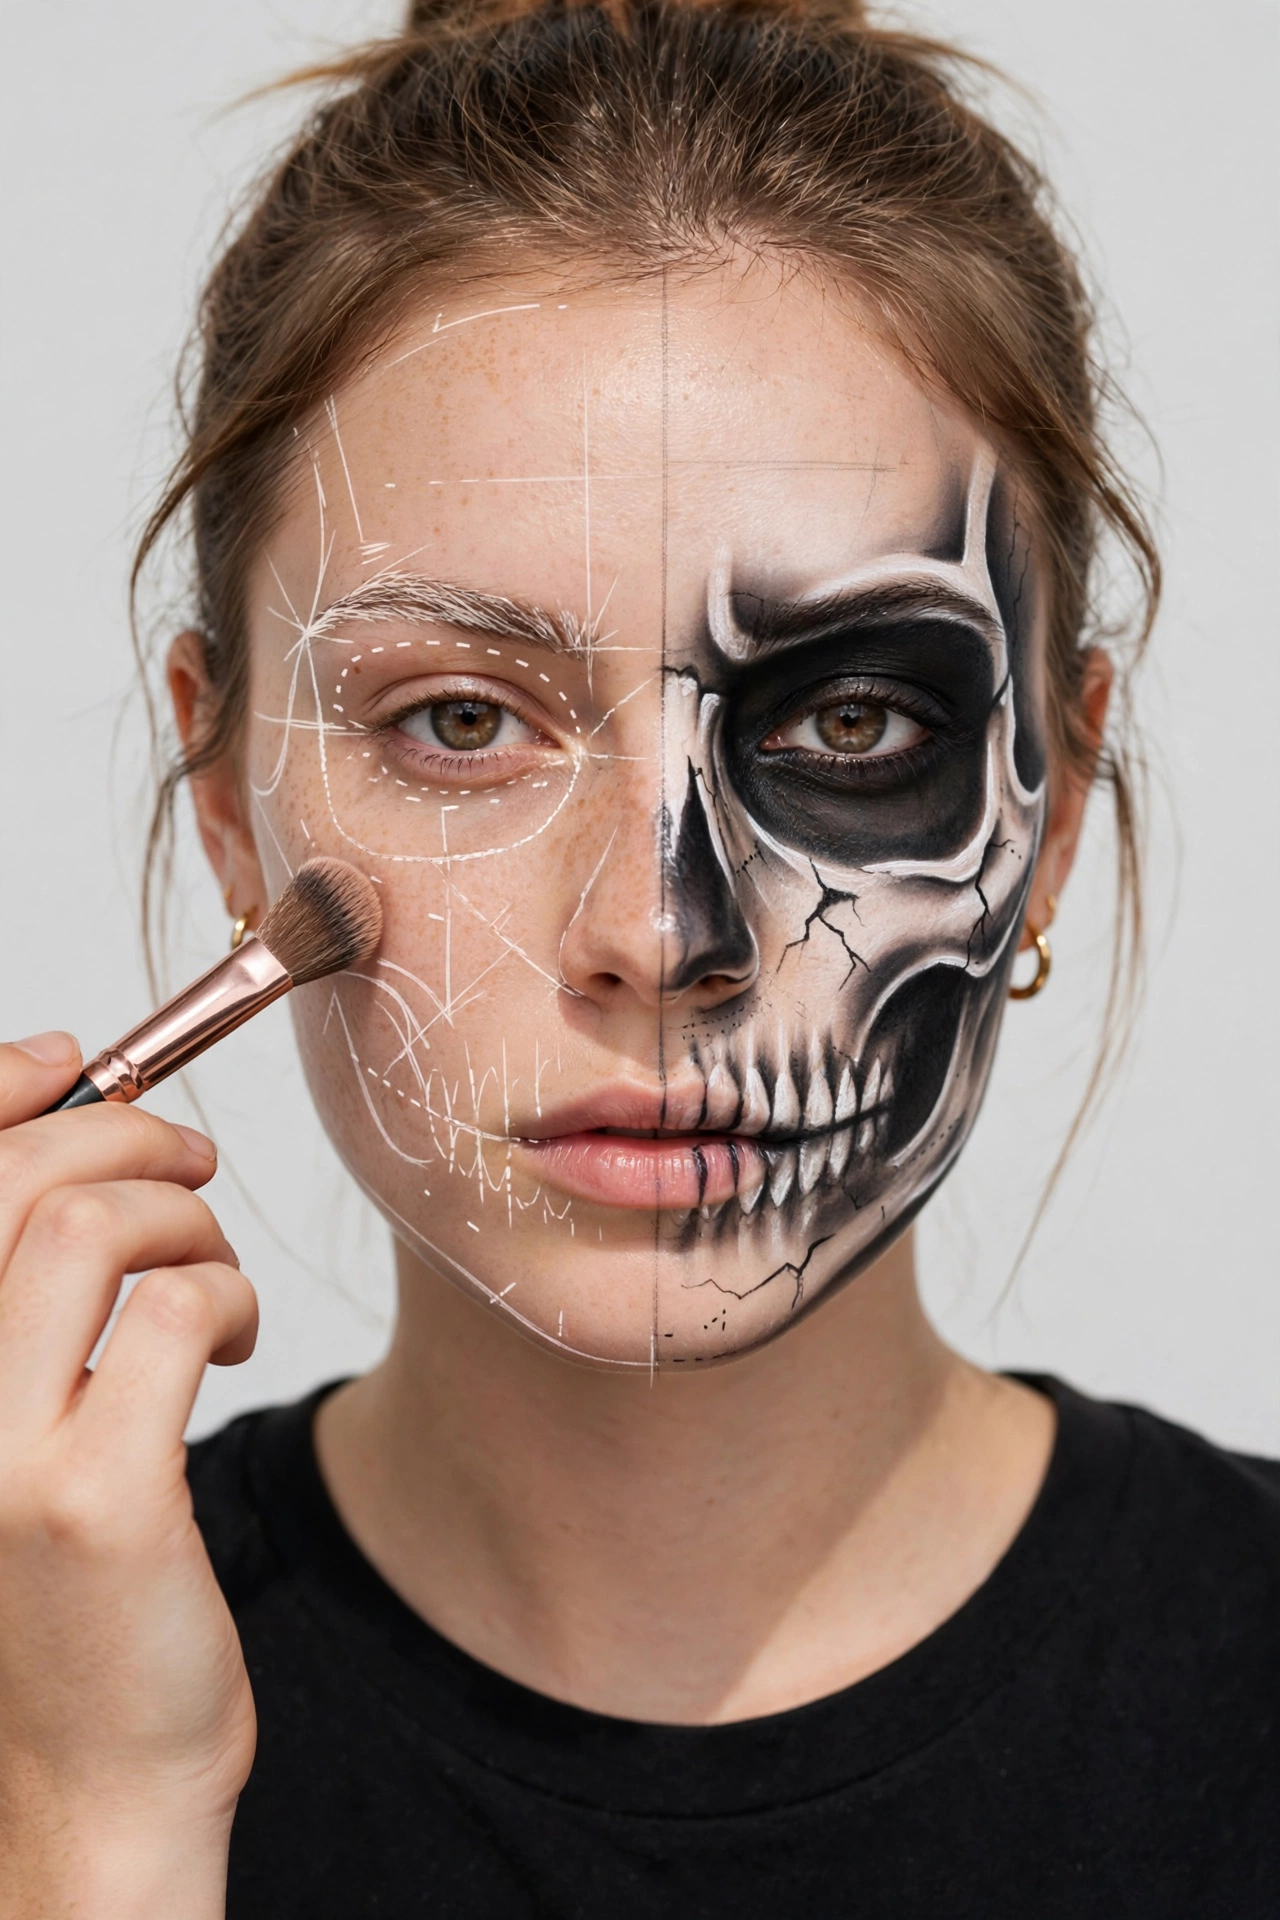
For skeleton halves, doll cracks, and button eyes — symmetry is everything. Do both sides simultaneously, step by step. Draw the left eye socket, then immediately draw the right one. Don’t finish one entire side first. Step back from the mirror every few minutes — distance reveals asymmetry your close-up view misses.
Face Paint Without Streaks
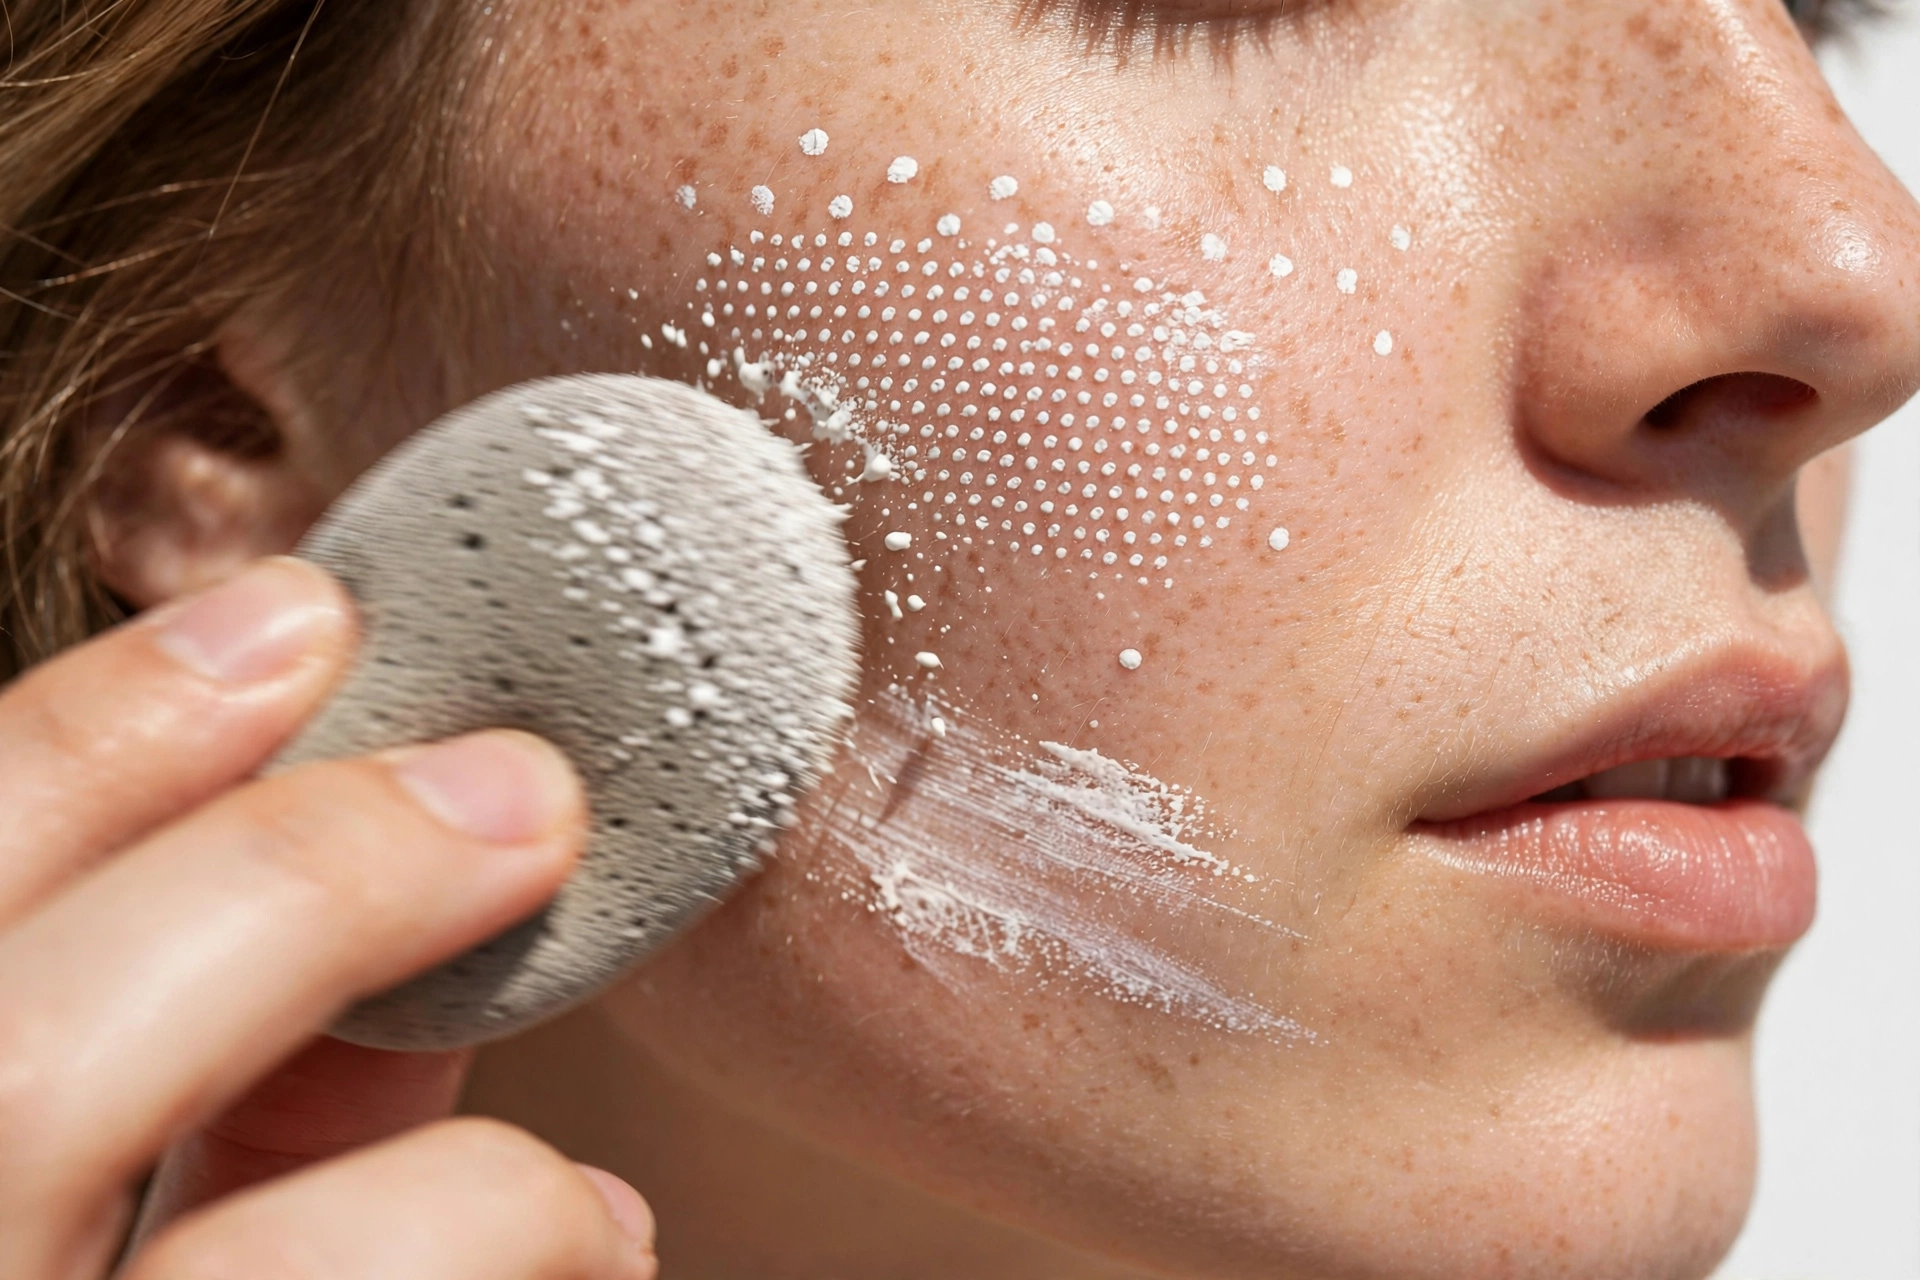
Streaky face paint ruins the whole look. Dampen your sponge, squeeze out excess water, then bounce — don’t drag — the paint onto your skin. Bouncing (stippling) gives even coverage. Dragging leaves streaks. Two thin bounced layers beat one thick dragged layer every time.
Details That Sell the Look
It’s the tiny details that separate “costume makeup” from “wow, how did you do that?” Use the very tip of your liner brush for crack lines, vein details, and stitch marks. Rest your elbow on a table for stability. Breathe out slowly as you draw — holding your breath makes your hand shake more, not less.
💙 Practice schedule (start 1 week before Halloween)
- Day 7–5: Practice your eyeliner wing 5 minutes a day. Muscle memory is real.
- Day 4–3: Do a full trial run of your chosen look. Time yourself. Photograph it.
- Day 2: Practice only the hardest part (cracks, symmetry, blending).
- Day 1 (Halloween): You’ve done this before. Relax and enjoy it.
❓ FAQ
Can I use regular makeup instead of special face paint?
Yes — for most looks on this list. Regular foundation, eyeshadow, and liner handle Wednesday Addams, cat, vampire, Rumi, doll, and Coraline perfectly. You only truly need crème face paint for full-color coverage (witch green, zombie base). Bonus: regular makeup is usually gentler on sensitive skin.
How do I make Halloween makeup last all night?
Three steps: primer before, setting powder + setting spray after. Blot instead of touching your face, and carry your lipstick for touch-ups. For crème colors and face paint, setting is non-negotiable — they’ll migrate within an hour without it.
What’s the easiest Halloween makeup for a total beginner?
Wednesday Addams or the glam cat. Both need only eyeliner and lipstick you probably already own, take 15 minutes, and need zero blending skills. Start there — you can always go bigger next year.
Have a wonderful day 💛
— J.
🌐 This post is also available in French: 15 idées de maquillage d’Halloween faciles 2026 — and in Korean: 쉬운 할로윈 메이크업 아이디어 15가지 2026.
If you prefer reading in French, I’ve also published the full French edition of this review: 15 idées de maquillage d’Halloween faciles 2026 : mignonnes, effrayantes et de dernière minute.
If you prefer reading in Korean, I’ve also published the full Korean edition of this review: 쉬운 할로윈 메이크업 아이디어 15가지 2026 | 귀엽게, 무섭게, 막판 응급까지.
💌 You May Also Like
- MEDIHEAL PDRN Lifting Pad Review: The Tub I Keep in the Fridge
- Ready to Savour Fall: Autumn Warm Mute Makeup, Colours & 2026 Outfit Ideas
- I Replaced My CA$80 Moisturizer With This CA$24 One (Honest Review)
🧹 How to Remove Halloween Makeup Without Ruining Your Skin
Here’s the part nobody talks about: Halloween makeup is much harder to remove than your everyday look. Face paint, crème colors, and fake blood are designed to stay put for hours — which means your regular micellar water won’t cut it. The good news? With the right routine, you can get it all off without scrubbing your skin raw.
Regular Makeup vs. Halloween SFX: What’s Different
Your daily foundation and lipstick dissolve easily with a normal cleanser. Halloween products are a different beast. Face paint and crème colors are pigment-dense and often water-resistant. Liquid latex bonds to skin like glue. Fake blood contains dyes that stain on contact. Treating them like regular makeup is the #1 reason people wake up on November 1st looking like a faded zombie.
The 3-Step Removal Routine
Step 1 — Oil or balm cleanser (the heavy lifter). Massage a cleansing oil or balm over dry skin for a full 60 seconds. This dissolves face paint, crème colors, fake blood, and waterproof liner without friction. Recommended: Clinique Take the Day Off Balm (~CA$48 at Sephora Canada) or The Ordinary Squalane Cleanser (~CA$11 at Sephora Canada) — both melt SFX products fast.
Step 2 — Foam or gel cleanser (the cleanup crew). After rinsing the oil off, do a second cleanse with your regular gentle cleanser to remove residue. If any color remains (green and red are stubborn), repeat Step 1 on those spots instead of scrubbing. Never scrub with a washcloth or exfoliating pad on thin, sensitive skin — you’ll cause micro-tears.
Step 3 — Soothe and repair. Halloween makeup + double cleansing = stressed skin. Pat on a hydrating toner, then a fragrance-free moisturizer. If your skin feels tight or looks red, add a thin layer of La Roche-Posay Cicaplast Baume B5 (~CA$25 at Shoppers Drug Mart) as an overnight barrier. Skip retinoids and acids for 1–2 nights.
💙 Stain prevention cheat sheet
- Green paint: Apply moisturizer as a barrier before painting. Remove with oil, never water alone.
- Red/black pigments: These stain fastest. Remove within a few hours of the party — don’t sleep in them.
- Fake blood: Blot, don’t wipe. Wiping spreads the dye over a larger area.
- Glitter: Press masking tape gently over glittery areas to lift particles before cleansing — it prevents glitter from scratching your skin during massage.
- Liquid latex: Peel from the edges slowly. Use oil underneath loosened edges. Never rip.
⚠️ Sensitive & Thin Skin: Special Rules
If your skin is thin and dry like mine, Halloween removal needs extra care. Patch-test every new face paint 24 hours before the party — even “hypoallergenic” ones. Choose water-based paints (Mehron Paradise AQ, NYX SFX) over oil-based; they’re gentler and come off easier. After removal, your skin barrier is compromised — no exfoliation, no vitamin C, no retinoids for at least 48 hours. Just cleanse, hydrate, and protect.
Rhinestones & coloured hair spray: lift gems gently from the edges — never pull — and shampoo twice to wash temporary purple spray fully out.
💄 Emergency Touch-Up Guide: When Your Look Falls Apart at the Party
It’s 11 PM. Your wing is smudged, your lip is gone, and your face paint is cracking. Don’t panic — and definitely don’t try to redo everything in a dark bathroom. Here’s how to fix the five most common Halloween makeup disasters in under two minutes each.
Smudged Eyeliner
Don’t wipe the whole thing off. Dip a cotton swab in a tiny bit of micellar water (carry a travel-size bottle) and clean up only the smudged edge, then redraw the line over the cleaned area. Pro move: set your liner with a matching black eyeshadow pressed on top before the party — it locks the line in place for hours.
Cracked Face Paint
Cracks happen when paint dries out or your face moves a lot (talking, laughing). Dab — don’t rub — a damp beauty sponge over the cracked area to rehydrate it, then pat a thin layer of the same paint over the top. Prevention beats repair: apply paint in thin layers and let each layer dry fully before adding the next.
Faded or Eaten-Off Lipstick
Dark Halloween lips (oxblood, black, deep red) show wear fast. Blot your lips with a tissue, reapply lip liner to redefine the edges, then fill in with lipstick. Skip the gloss for touch-ups — it slides off faster. Matte is your friend for longevity.
Melted Base From Sweat or Dancing
Blot (never wipe) with oil-absorbing sheets or a tissue first. Then press — don’t swipe — a translucent powder or your compact foundation over the shiny areas. If your base is truly sliding off, don’t layer more product on top. Blot it down, powder lightly, and accept a slightly softer look — cakey is worse than dewy.
💙 The party touch-up kit (fits in a clutch)
- Travel-size micellar water + 5 cotton swabs
- Your lipstick or lip liner
- Black eyeliner pencil (for quick fixes)
- Blotting papers or folded tissues
- Mini translucent powder or compact
- 2–3 adhesive rhinestones + tiny tube of lash glue (if your look uses gems)
- One hair tie (for emergency hair fixes)
⭐ Pro Tips: Make It Last & Photograph Like a Dream
Prep Like a Pro (Before You Start)
Longevity starts before the first brushstroke. Moisturize well, then apply a gripping primer — NYX Professional Makeup Face Primer (~CA$20) or e.l.f. Power Grip (~CA$14) both work. For eyeshadow-heavy looks, an eye primer is non-negotiable; without it, metallics and brights crease within two hours. Set every cream or paint layer with translucent powder before moving on. Think of it like building a house: each layer needs to be locked before the next goes on.
How to Look Amazing in Photos
Flash photography washes out makeup — go 20% bolder than you think you need. Contour deeper, blush heavier, liner thicker. Matte products photograph better than shimmery ones under harsh flash (shimmer can look like sweat). And here’s the secret nobody tells beginners: blend your makeup down your neck and onto your ears. A floating pale face in photos is the #1 giveaway of amateur Halloween makeup.
5 Beginner Mistakes (and How to Fix Them)
1. Skipping the patch test. New face paint on untested skin can mean a rash on Halloween morning. Test on your jawline 24 hours ahead. Always.
2. Applying paint too thick. One thick coat cracks; three thin coats flex with your face. Thin layers are the single biggest difference between amateur and pro-looking SFX.
3. Forgetting to set. Unset crème colors transfer onto everything — your hands, your costume, your friend’s white shirt. Powder + setting spray, every time.
4. Ignoring the neck. Your face is green but your neck is beige? Instant costume fail. Whatever goes on the face continues to the neck and behind the ears.
5. Sleeping in Halloween makeup. Just don’t. Pigments left overnight stain skin for days and clog pores badly. No matter how tired you are, do the 3-step removal. Your November 1st self will thank you.
Which look are you trying this year? I’m personally torn between Rumi and the glam skeleton — one of them is happening on October 31st, that’s for sure.
What is the easiest Halloween makeup look for a beginner?
Wednesday Addams or the glam cat are the easiest starting points, and both take about 15 minutes with no blending skills needed. Wednesday uses a pale base, NYX Epic Ink Liner and a dark berry lip, while the cat look adds a sharp wing, whisker dots and a contoured nose.
How do I remove Halloween makeup without irritating my skin?
Massage an oil or balm cleanser over dry skin for about 60 seconds to dissolve paint and waterproof liner, then do a second cleanse with a gentle foam or gel cleanser. Never scrub; finish with a fragrance-free moisturizer and, if skin feels tight or red, a soothing barrier balm overnight.
How can I make my Halloween makeup last all night?
Moisturize first, then use a gripping primer before makeup, and finish with setting powder plus setting spray. Set each cream or paint layer as you go, blot rather than touching your face, and carry your lipstick for quick touch-ups.
What basic products do I need for Halloween makeup?
Most looks here only need regular makeup you may already own: foundation, eyeshadow, black eyeliner and lipstick. Add primer, translucent powder and setting spray to help it last, and add creme face paint only for full-colour looks like a witch or zombie.
Get the Free Canada Savings Checklist
Join the newsletter — get the free PDF checklist and weekly Canada savings tips in your inbox.
Read Next


Some links in this post are referral or affiliate links. If you sign up or buy through them, I may receive a bonus or commission at no extra cost to you. It helps keep this blog running — thank you!